WooCommerce: Retain Field Values @ Checkout Reload

Go to WooCommerce Checkout as a logged out user. Fill out billing name, surname, address, email and phone. Change your mind and go back to Cart. Return to Checkout. Billing name, surname, email and phone (basically everything but the address) are gone!

But hey, this annoying WooCommerce flaw is about to go away with a few lines of code. Either reload the Checkout page or go back to it later – your info will still be there (as long as you haven’t cleared your cache/cookies and the WooCommerce session hasn’t expired of course).

Enhoy!

Continue reading WooCommerce: Retain Field Values @ Checkout Reload

WooCommerce: How to Enable Distraction-free Checkout

It’s always a sign of success when customers show interest in your products, add them to their carts, and proceed to checkout. But what’s the point if they drop off and leave your site in the middle of the checkout process? Unfortunately, cart abandonment is common, and one of the major reasons behind incomplete purchases is a complicated and distractive checkout procedure. 

According to the Baymard Institute research, 26% of online shoppers abandon the carts because of too complicated or too long of a checkout process, significantly impacting the eCommerce sales and revenue – losing $18 billion annually, to be precise. 

Losing valuable customers and such a tremendous amount of revenue is no joke – and one of the best ways to prevent this situation is by redesigning the WooCommerce checkout.     

The idea is to remove as much clutter and distractions through the checkout procedure – so customers can focus on completing the checkout entirely and end up buying your products. 

But first, let’s understand the use of these plugins and how they help your WooCommerce store and eCommerce business. 

Continue reading WooCommerce: How to Enable Distraction-free Checkout

WooCommerce: Automatically Register Guest Checkouts

A disclaimer first: please make sure this is legal in your country and also that your checkout visitors are aware they will become registered customers without explicit consent (i.e. without ticking a “create an account on this site” checkbox).

So, yeah, there is a way to turn guest checkouts into registered customer ones. Also, there is a neat WooCommerce function to bulk add all past guest orders to a new customer (wc_update_new_customer_past_orders).

Of course, “Allow customers to place orders without an account” must be enabled in your WooCommerce settings, otherwise you’re not allowing guest checkouts and the snippet will be irrelevant.

So, here’s the fix. Enjoy!

Continue reading WooCommerce: Automatically Register Guest Checkouts

WooCommerce: Phone Input Mask @ Checkout

The WooCommerce checkout page has a default phone input field that gets validated upon checkout (for HTML geeks, it’s actually an input type = “tel”). Usually, if such phone number contains letters, it will fail and checkout will stop.

But that’s not the problem. Let’s suppose you only have US customers, or that you want to force customer to enter a certain format (e.g. “+” or “01” as prefix)… well, there is no way to achieve that out of the box within the WooCommerce settings.

However, anything is possible in regard to customization, so all we need are 3 small changes: force the billing phone input to stay within a “maxlength“, set the phone input placeholder so that users know what the format should be before typing in, and finally add some JavaScript to provide an input “mask”, so that the final output is exactly what we want (123-456-7890 in this case scenario, but it could be anything).

Enjoy!

Continue reading WooCommerce: Phone Input Mask @ Checkout

WooCommerce: Top Checkout Field Editor Plugins

If you haven’t thought about checkout page customization before, perhaps it’s time to start doing so. 

There’s no question that it’s a hot topic in the WooCommerce community since, admittedly, the default checkout page leaves a lot to be desired.

You don’t want to be behind the curve. Here at Business Bloomer, Rodolfo has put out 90+ different checkout page snippets that have been eagerly lapped up by the WooCommerce developer and merchant community. Seriously, these are some of our most widely read and engaged posts. 

But in addition to snippets, it’s worth checking out some checkout field editor plugins. Sometimes, instead of a specific tool with a narrow focus, you need a Swiss army knife. Think of snippets as the tools, and checkout field editors as the Swiss army knife.

Continue reading WooCommerce: Top Checkout Field Editor Plugins

WooCommerce: Move Labels Inside Checkout Fields

Although UX and accessibility experts won’t like this customization, it’s still important to know “what’s possible” with WooCommerce.

In regard to the checkout form (billing + shipping + notes), there is a useful “woocommerce_checkout_fields” hook (filter) that is widely used by developers like me to alter the behavior of input fields.

In today’s episode we will take a look, indeed, at how to remove the checkout field labels from their default position (above fields), and use them as placeholders instead, so that we save up some vertical space.

Enjoy!

Continue reading WooCommerce: Move Labels Inside Checkout Fields

WooCommerce: The Elusive Nature of 1-Click Checkout

Increasing sales and conversion rates is one of the major goals of every eCommerce store owner. However, it’s no secret that you can only achieve it by attaining a peak level of user and customer experience. 

While at the beginning of the dot com online shopping era, customers were elated with the mere fact that they could buy anything they desired from the comfort of their homes – no matter the payment method or how long the delivery takes. Customers today are very particular about their preferences and expectations – especially when it comes to checkout. 

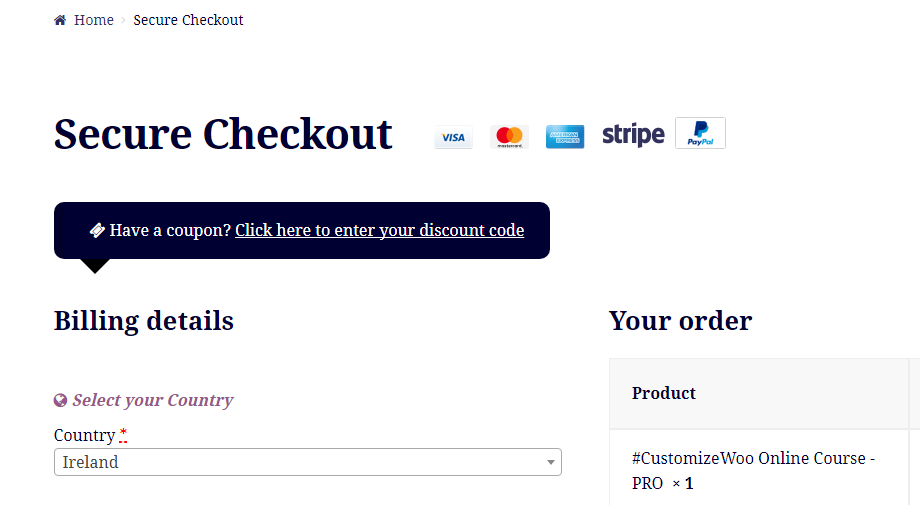
Checkout is an essential factor in improving customer experience as it’s where your customers finalize their sales and pay for the products or services you offer. For example, Amazon – one of the biggest eCommerce giants, provides an optimal and one-click checkout experience to its customers. 

While many eCommerce companies still cling to the multi-step checkout process – one-click checkout delivers simplicity and speed in the customer checkout process. The key is to make checkouts smooth and quick – eliminating the hassle of entering card details repeatedly for your customers. Out of 69.80% of cart abandonment rate – 18% of customers abandon their carts because of a long and complicated checkout process. 

The solution? PeachPay, the one-stop-shop checkout & payment plugin for WooCommerce

An instant and less complicated checkout process significantly impacts conversion rates and boosts your sales. So, in this article, we’ll see how you can use and enable PeachPay – an excellent WooCommerce-funded checkout & payment plugin, to boost conversions and sales. 

But first, let’s quickly see how a one-click checkout solution will benefit your WooCommerce store. 

Continue reading WooCommerce: The Elusive Nature of 1-Click Checkout

WooCommerce: Move Email Field to Top @ Checkout

This tutorial is a spin-off of a previous article (WooCommerce: Move / Reorder Checkout Fields) as I feel there is a huge boost of requests for this task alone.

Moving the billing email field to the top of the WooCommerce checkout gives you many benefits: because it’s the first field customers need to fill out, you can capture their email address (upon marketing permission) and send them cart reminders, feedback requests and similar if they do not complete the checkout.

Also, having the email first can make you save time in case the user is already registered, and you could save them time while checking this against the list of customers, so a prompt can be displayed to load all their billing/shipping details for example.

Either way, it’s super easy to move the email field to the top. Enjoy!

Continue reading WooCommerce: Move Email Field to Top @ Checkout

WooCommerce: Checkout Test Automation 101

E2E Checkout Testing

Testing the WooCommerce checkout is extremely important for your ecommerce business.

Every time you install a new plugin or update WordPress you might run into issues: for example, the cart and payment pages could stop working until you fix the problem.

You don’t want to lose sales and undermine your website reputation, do you? So you must test all the WooCommerce processes on a regular basis, also called “end to end” (E2E) testing.

But how can you do that without wasting too time?

Spoiler alert: simply create an automated test, and let the robot test your WooCommerce website on a regular basis, so that you never have to worry about doing it manually.

Luckily for you, there are some great tools – such as the two you will soon read about – and WooCommerce professionals that can do it for you on a daily or whatever basis.

Here’s your quick introduction to setting up your checkout test automation.

Cheers to a checkout page that works 365 days a year.

Continue reading WooCommerce: Checkout Test Automation 101

WooCommerce: Maxlength and Minlength for Checkout Fields

If you’re familiar with HTML, you can add “maxlength” and “minlength” attributes to an input field in order to force its value to be min X and max Y characters long. This is all good and easy, so we might as well see what happens on the WooCommerce Checkout page once we apply such attributes to a given custom field.

Spoiler alert: maxlength works, while minlength does not. Hence, forcing a given checkout field to have a minimum length is actually quite impossible, unless we validate the posted data (a field input value that is not long enough) once the checkout is submitted. That’s a bummer, and in this article I will also explain how to contact WooCommerce so they can improve a functionality / fix a bug.

Enjoy!

Continue reading WooCommerce: Maxlength and Minlength for Checkout Fields

WooCommerce: How to Customize Checkout For Conversions

I had the honor to speak at WCEU 2020 thanks to WooCommerce, who hosted me in their Sponsor track. It was a short and sweet lightning talk on the first day (Friday), called “Customizing The WooCommerce Checkout To Improve Conversions“, followed by a live coding session on Saturday.

Here’s the video recording of the lightning talk, as well as a few PHP and CSS snippets you can copy/paste to improve your WooCommerce Checkout and immediately expect an increase in conversion rate. So, enjoy the video and then go test the snippets you find below!

Continue reading WooCommerce: How to Customize Checkout For Conversions

WooCommerce: Show SKU @ Cart, Checkout, Order & Emails

When SKU matters to the end user, displaying it in the Cart page, Checkout page, Thank you page, My Account View Order page and Order Emails under the item name is a must.

Ideal for B2B businesses and international brands, this simple customization can help you learn how to add any sort of content under the Cart/Checkout/Order item names. Simply use the same hook and try “getting” something different than SKU with this guide. Enjoy!

Continue reading WooCommerce: Show SKU @ Cart, Checkout, Order & Emails

WooCommerce: Dynamically Hide / Show Checkout Field

We already saw a lot of examples e.g. hiding checkout fields if a product is virtual or hiding checkout fields if a checkbox is manually checked… but this time I want to hide a field dynamically – automatically – based on whether another checkout field is empty or has a specific value.

In this example, I will demonstrate how to hide the “billing phone” if “billing company” is empty or no information is entered. Of course, you also have to disable the mandatory attribute for the billing phone from the Customizer settings, otherwise checkout validation will fail. You can readapt this snippet to any other checkout field combo – just identify the input IDs and change jQuery accordingly. Enjoy!

Continue reading WooCommerce: Dynamically Hide / Show Checkout Field

WooCommerce: Move Order Notes @ Checkout

We already saw how to hide Order Notes on the WooCommerce checkout page. This time around, however, our goal is to “move” them – and specifically remove them from their default position (under the shipping form) and add them back under the billing form.

As you can imagine, this is a combo snippet: (1) we remove them (and we’ll use the snippet as per the link above) and (2) we create a new billing field. Finally, (3) we also need to “save” this new field value into the original order notes custom field meta.

If this is difficult to understand don’t worry – just copy/paste the snippet into your functions.php and see magic happen. Enjoy!

Continue reading WooCommerce: Move Order Notes @ Checkout

WooCommerce: Add Shipping Phone @ Checkout

I’m surprised WooCommerce doesn’t offer this field out of the box. Most ecommerce websites actually require a shipping phone to organize delivery and communicate with the end customer in case there are problems.

Thankfully, there is a hook (filter) for that. It’s called “woocommerce_checkout_fields” and can be used to remove, move or add checkout fields quickly. And here’s how to add, for example, a new shipping field called “shipping_phone”. Enjoy!

Continue reading WooCommerce: Add Shipping Phone @ Checkout

WooCommerce: Add Upsell Area @ Checkout Page

If you want to increase your AOV (Average Order Value), you can definitely start from the WooCommerce Checkout page.

A client asked me to place a “Donation Area” close to the “Place Order” button (so at the bottom of the page, once customers are ready to pay) to drive more awareness around this add-on. All I had to do was creating hidden products with a donation value, use my own “Custom Add to Cart URL” guide to create add to cart links and print an HTML box right above the checkout button by using my WooCommerce Visual Hook Guide for the Checkout Page. Enjoy!

Continue reading WooCommerce: Add Upsell Area @ Checkout Page

WooCommerce: Set Checkout Field Value @ Order Creation

This is a very specific function. Sometimes, you need to “set” a checkout field value upon order creation (because it was not required and left empty for example). In some other cases, you might want to override what the customer input if you have certain requirements.

Either way, overriding the checkout fields on order creation is super easy. Here’s how it’s done – enjoy!

Continue reading WooCommerce: Set Checkout Field Value @ Order Creation