
You build your online eCommerce store, optimize it to drive conversions, and manage it exceptionally well to deliver quality performance to your customers. However, despite these efforts – over half of your website visitors don’t complete the checkout process and abandon your store without making a purchase.
So, when you’re so close to making a sale, what makes customers leave your store? While there can be many reasons, one of the most common is a long checkout process.
Forter’s statistics suggest that around 50% of customers may abandon their shopping carts if the checkout takes longer than 30 seconds.
The solution? PeachPay for WooCommerce.
PeachPay provides a one-click checkout experience – making checkout less cumbersome and increasing conversions to your store. In addition, it allows repeat customers to checkout with a single click – thus enhancing customer convenience. Learn more about PeachPay’s one-click checkout here: WooCommerce: The Elusive Nature of 1-Click Checkout.
This article shares a step-by-step process to install PeachPay on your WooCommerce store. But first, let’s take a brief look over its key features.
Key Features of PeachPay Checkout for WooCommerce
Here are the key features of the PeachPay plugin that makes it flexible and beneficial for your store and your customers:
- Adds an Express Checkout button to your product, checkout, and cart pages and the sidebar/mini cart without setting up anything.
- Allows returning customers to checkout with a single click.
- Allows you to use the plugin in test mode to check how the plugin works.
- Provides Strong Customer Authentication (SCA) support with 3D Secure.
- Provides zero-fraud guarantee and enables instant payouts through PayPal and Stripe.
- Supports 25 languages.
- No setup or additional fees.
- Fully customizable per your store’s theme.
- Supports WooCommerce Subscription Integration.
- Accepts every currency that PayPal and Stripe support.
- Supports promo and discount codes.
Now that you know how PeachPay can help you improve your checkout experience for the customers, let’s see how you can begin installing it.
How To Download And Install The PeachPay Plugin On Your WooCommerce Store
There are two effective and quick ways to install PeachPay. Let’s look at each of these methods.
Method 1: Installing PeachPay From The Official Website
Head to the peachpay.app website and click on the Get PeachPay button.
It’ll request you to enter your store URL. Enter your WooCommerce store URL in the textbox and click on the Get button.

Then, click on the Install Now button at the bottom-right corner on the next screen of the page.

This will redirect you to your store’s WordPress dashboard. Once you successfully install the PeachPay plugin – click on the Activate Plugin button on the screen.

Once that’s done, you’ll get a notification that says ‘Plugin Activated’ on your dashboard.

This successfully installs the PeachPay plugin, and you can start with connecting your payment solutions and setting up the configurations to use the plugin on your store.
But, before that, let’s see another way to install PeachPay on your store’s dashboard.
Method 2: Installing PeachPay From Your WordPress Dashboard
Instead of downloading the plugin from the official website, you can also get it from your store’s dashboard.
Here are the steps to go about it:
First, go to your store’s WordPress dashboard, and click on the Plugins link.

Click on Add New, then type “PeachPay” in the search bar and click on the Install Now button.

Once the plugin gets installed, click on the Activate button.

Next, click on the Approve button to connect the PeachPay plugin to your WooCommerce store.

The next step is to choose a relevant payment method – Stripe or PayPal to display in your PeachPay checkout window.
You can connect to both these payment methods using PeachPay to provide multiple payment options to your customers and improve customer satisfaction.

Enter your email ID and log in to your Stripe account to connect it to the plugin. Or, you can also create a new Stripe account, enter the prompted details on the screen, and connect Stripe to the PeachPay plugin.

Then, you’ll receive a plugin activation key sometime after connecting to your Stripe account. Ensure to enter the activation key, click on Save Settings, and start using the plugin on your store.
However, it takes 2-3 days to get the activation key. So meanwhile, you can enable the test mode of the PeachPay plugin and play around with the settings.
Setting Up The PeachPay Plugin
Once you connect to the payment methods – it’ll redirect you to the General settings page to set up the plugin configuration per your specific needs.

While you’re trying out the test mode, your customers won’t be able to see the PeachPay checkout button on your WooCommerce store.
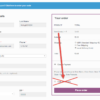
Here, you can select the language for your checkout button. You can also select the detect from page option – if you use a language switcher plugin.
You can customize your checkout button preferences and change the button’s text color, background color, text (Express Checkout), rounded corner size, and effect.

The alignment and width of the PeachPay button on your cart, checkout, and product page are also customizable.

It also lets you customize the header text and additional text above and below the PeachPay button.

Checking Out With PeachPay
It’s even easier to check out with PeachPay than to set it up.
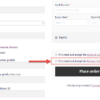
Customers simply need to click on the Express Checkout button to complete the checkout process. First-time customers need to complete a quick and streamlined checkout form – which collects all the necessary customer details required for checkout.
You can customize this form, remove or add new fields, and adjust the field width in the field editor.

At the same time, repeat customers can checkout with a single click after clicking on the Express Checkout button – without filling out the form again.
Thus, it ensures hassle-free and easy checkout for customers – providing seamless customization and selling experience for your store.
Conclusion
Cart abandonment is a tremendous issue for eCommerce businesses, with the global cart abandonment rate being 75.6% as of 2022.
PeachPay significantly reduces this rate with a smooth and one-click customer checkout experience. So, if you’re ready to improve your store’s conversions – install the PeachPay plugin today!
You can also check out PeachPay’s website to reach out to their support team or look at their FAQs for any common doubts.


Hi Rodolfo. I just discovered Peachpay from you… My question is, are they trustworthy? As much information you can provide, the better. I highly respect your opinion and thank you for your amazing work for the community.
Hi Luis! Yes, you can trust them, and WooCommerce and other companies invested in PeachPay recently