The goal of marketing automation is to help you save on effort. However, sometimes it comes at the price of poorly targeted campaigns and half-baked marketing content, which can be outright damaging to your business.
The other problem with most of WooCommerce marketing automation tools is that they have a one-off approach to marketing that aims to get as much as possible from one user interaction – during checkout, for example – without providing for loyalty or retention. This goes against the golden rule of marketing, where your biggest asset is your leads and customers and your biggest mission is to retain them.
The solution is to use a omni-channel marketing approach, where a central tool collects and enriches user behavior and history in a unified profile and then uses that profile to deliver relevant campaigns across all user touchpoints.
This ensures more harmonized marketing, a seamless experience for your users and eventually more trust and engagement with your brand. These are all the ingredients you need to increase the loyalty lifetime value of your users and customers.
An ideal marketing automation tool should excel in these three processes:
- Targeting and segmentation: The cornerstone of marketing is targeting the right person at the right time. Have you ever seen Airbnb retargeting ads for the property that you booked two weeks ago? Then you know what I’m talking about.
- Cross-channel operation: Apart from seamlessness, this ensures less clutter in your marketing tech stack, less of a learning curve and lower costs.
- Relevant content: The ace of hearts for a marketing campaign! This guarantees more engagement from your audience by making them feel seen and heard. This is one thing that the majority of marketing tools fail to do!
In this post we will look at how Growmatik, a WooCommerce marketing automation plugin, implements the above three features to make more effective campaigns in the most common marketing automation scenarios.
With an omnichannel marketing approach you can serve campaigns that are highly related to the customer journey stage, website activity and shopping history. You can personalize the offers you include in these campaigns based on these metrics.
1- Build a cross-channel cart recovery campaign
With Growmatik, as part of your cart abandoner follow-up attempts, you can display abandoned cart items on the website and in popups and cart recovery emails.
In order to do this in Growmatik, from the Automation > Rule page, create an automation with the trigger event Cart Abandoned and set a chain of three actions such as Send Email, Show Popup and Personalize Page (homepage).

As a result of this automation, the cart abandoner not only will receive a follow-up email but also in their next visit to your website they will see a different version of your homepage and a popup including the abandoned cart items. Let’s see how we can include these smart product grids inside our marketing material in Growmatik.
In the above example, you will be taken to the email builder, popup builder and personalize page environments in the process of setting up these three actions. Inside the element library in each of the builders, simply add a Product element wherever you want. From the element options in the sidebar, choose the Products in Cart as the filter.


2- Show smart cross-selling suggestions in your campaigns
The smart product grids in Growmatik’s email builder come in handy when creating personalized upsell and cross-sell suggestions for your emails and website.
You need to simply set Order Placed as a trigger event and then define the channels where you want to display your cross-sell product recommendations. When creating the email content, popup or website personalization, select one of the filters related to cross-selling for the product filtering criteria:
- Cross-sells linked to existing product page
- Cross-sells linked to products in the cart
- Cross-sells linked to previously visited products
- Cross-sells linked to the last order

3- Make better promo campaigns using automated personalized coupons
Many tools can help you schedule date-based campaigns for seasonal offers, holidays or one-time discounts. However, including personalized discounts or showing the promos in both emails and popups on your website can make your campaigns outstanding.
For example, as a birthday promo:
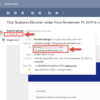
- Create an automation with the Birthday trigger event and Send Email as the action.
- Save time by selecting the Happy Birthday Promotion premade template
- In the email builder area you can see a Coupon element in the email content.
- In the element sidebar options, define the discount type or the eligible products.
Once the automation is rolled out, every user will receive the email on their birthdays with a functional and personalized WooCommerce coupon. You can also add an extra popup action to your automation to display a “Happy Birthday!” message and a coupon inside a popup on their next visit.

You can use this method for other promo campaigns such as:
- Calendar occasions such as Black Friday, Thanksgiving or Valentine’s Day
- Welcoming and driving first purchases (using User Created as a trigger event)
- Celebrating loyal and VIP customers (using RFM segmentation filters as the trigger audience to target based on historical loyalty)
- Restoring slipping customers (you can include a product grid with the filter Discounted Products in the email and a coupon to motivate them)
4- Display tailored products in your campaigns based on viewed or purchased items
Another benefit of a cross-channel marketing approach is being able to personalize offers in your campaigns based on a customer’s visited page or purchased products. For example, if a user visits product pages related to the photography category, you can show the products related to photography across your website or in your nurturing campaigns. Let’s see how.
In Automations > Rules, create an automation with the trigger event as None and then leave the audience as Everyone. Then set the action as Send Email and in the email builder add a product element with the filter set as Related to Previously Visited Products.
Now we add a second action below Send Email and set it as Personalize Page. Choose the page where you want to show the personalized items (for example, the homepage) and in the upcoming page personalizer area simply add the product element wherever you want in the page and set its filter as Related to Previously Visited Products.

As a result of this automation, everyone will see the products related to their recently viewed products inside the email and your homepage.
Showing products the customer is interested in rather than some generic product list will help reduce friction and streamline the conversion process.
Wrapping up
Omni-channel marketing will help you make more engaging marketing campaigns by tapping into what your audience is interested in. Along with personalized offers, this will prove an effective way to get rid of one-size-fits-all marketing strategies and make your customers feel recognized, generating more loyalty and lifetime value for your WooCommerce business.