Here is a collection of tips, snippets, customizations, plugin reviews and how-to tutorials to answer your biggest WooCommerce questions, curated by Rodolfo Melogli.
Please remember feedback is vital and that your social media shares, blog comments and WooWeekly newsletter sign ups help me understand which WooCommerce content works and which not, so that I can fine-tune my writing :)
Thank you in advance and enjoy!
If a product cannot be purchased because it is out of stock, why would you want to tell people that it’s on sale – only because it has a sale price?
That would probably clutter your shop and maybe get the customer to click on the wrong item just because it was standing out, only to find out they can’t purchase it!
So, let’s fix this little “design bug” in WooCommerce – let’s make sure the Sale! badge gets hidden in case the product is out of stock. Enjoy!
Continue reading WooCommerce: Hide Sale! Badge If Product Is Out Of Stock
If you do a lot of manual work such as creating WordPress users for a B2B WooCommerce site (because they can only shop if they have an account, and you’ve disabled registration on the frontend), you may want to populate some Billing and Shipping fields so that you can save some time.
For example, imagine if all customers are based in Florida, USA; you could automatically populate their billing country, billing state, shipping country and shipping state!
So, let’s see how to approach this. Enjoy!
Continue reading WooCommerce: Populate Billing & Shipping When Adding A New User @ WP Dashboard
Each payment method on the WooCommerce Checkout page comes with a description right below the label. What if we could achieve something similar for the shipping rates, so that we can explain to the customer the difference between each method?
This question came up today in our private Slack channel for Woo developers, and we were able to write a quick snippet that does the trick. Here’s the complete code – enjoy!
Continue reading WooCommerce: Add Shipping Rate Description @ Cart & Checkout Page
We already saw how to disable the default payment gateway in the WooCommerce Checkout page, so that users are forced to click on one of the options.
Well, we can do the exact same with the shipping methods!
In this way, customers will be forced to actually click on one of the shipping options. This is helpful when you don’t want to have a default shipping, and when your customers often “forget” to pick the correct one and ask to change it once the order has been placed.
Enjoy!
Continue reading WooCommerce: No Default Shipping @ Checkout Page
When you land on the WooCommerce Checkout page, one payment option (radio button) will be selected by default. this is defined based on the last payment method (logged in customer), or the payment gateway sorting (logged out customer).
Often it happens, however, that customers forget to change their payment selection, and therefore end up checking out with the wrong payment option. Which means, more admin work.
With this simple snippet, we will inject some JS in the Woo Checkout page, so that on load, all payment method radio inputs will be unchecked. Super easy!
Continue reading WooCommerce: No Default Payment @ Checkout Page
Most browsers show “up and down” arrows inside number inputs. The WooCommerce add to cart quantity is a number input also, which means this will get the arrows as well.
But especially when you have add to cart plus minus buttons, the up and down arrows become useless. So, here’s a way to hide them via custom CSS.
Enjoy!
Continue reading WooCommerce: Hide Add To Cart Quantity Input Arrows
Especially for B2B sites, it’s likely that customers are managed by the store admin and are not allowed to change their billing/shipping address unless they request to update it.
But even if you’re simply curious, there is a way to turn each checkout field into read-only inputs. In this way, the saved billing and shipping address will load, and the logged in customer won’t be able to change any data before checkout.
A little note: country and state are dropdowns, and this means adding the “readonly” attribute won’t stop you from changing the selected value. However, if we turn all fields to input type “text”, this problem will go away. And this is why you find two statements in the snippet below; first we turn the field into a text input, and then we make it read-only.
Enjoy!
Continue reading WooCommerce: Read-only Checkout Fields
WooCommerce product images on the Single Product page get the default Zoom + Lightbox + Photoswipe behavior. This is super helpful when the images are super important for sales conversion, and less helpful in other cases (in fact, here’s a snippet to disable Zoom etc. from the Woo product pages).
Now, the challenge that I had on this same website was that I wanted blog readers to also enjoy the same WooCommerce zoom / lightbox features on blog post images and screenshots. So, without reinventing the wheel, I’m now loading the WooCommerce scripts on pages like this one (single post), and on image click I trigger the lightbox!
You can test the feature by clicking on the image below. Enjoy!
Continue reading WooCommerce: How to Reuse Zoom/Lightbox Scripts On Non-Product Images
If a WooCommerce checkout field is set to “not required“, its label will get the “(optional)” suffix. Considering the required fields get the red “*” suffix, you may want to get completely rid of the (optional) string.
Sure, you could be using CSS to hide it… but as usual this is not ideal. With CSS display:none, the string loads and then you hide it; with PHP you avoid the loading in the first place.
So, let’s see how this is done – this snippet is also running on this same website so it should definitely work!
Continue reading WooCommerce: Remove “(optional)” From Checkout Field Labels
In WooCommerce you have publicly accessible product archives for product categories e.g. “all tables“, product tags e.g. “all casual” and product attributes e.g. “all medium“. URLs are available to you and you can even define their custom permalink slug base via the settings e.g. /product-tag/, /product-cat/, etc.
What’s interesting though, is that there are many more “custom taxonomies” that are registered in WooCommerce, however they don’t seem to have their own archive, because it’s been decided they were not useful.
But what if you want to see, as a customer, all the shop products belonging to a specific shipping class? We’ve seen, for example, how to split the cart into packages based on shipping class – so it would be super helpful to customers, in such a case, to view all the products belonging to each shipping class at a given URL.
So, let’s do that!
Continue reading WooCommerce: Product Archive For Shipping Classes
There are a million plugins out there that allow you to make the most of WooCommerce “cart packages” – this is a short way to say that you have the chance to assign cart items to multiple “packages“, so that the customer can pick different shipping methods for each package.
For example, imagine you sell products that are only available for “pick up in store“, and others that are shippable. By splitting the cart into 2 packages, the customer can place both product types in the same cart, but will be able to choose “Local pickup” for package 1 only, while for package 2 they’ll select one of the available delivery rates.
Splitting the cart into multiple packages is as easy as looping through the cart items, and assigning them to its own package array based on shipping class. Enjoy!
Continue reading WooCommerce: Split Cart Into Packages
Business Bloomer website sells in USD only for the time being, as that seems to be the standard for WordPress plugin / products stores.
However, I prefer to invoice clients in EUR (I also switch PayPal and Stripe keys on the go). Which means, I needed to find a way to “set” a different currency whenever I create a manual order (which, by default, is in USD). So, here’s the fix!
Continue reading WooCommerce: Set Different Currency For Manual Orders
Every time an order is placed on your WooCommerce website, the purchased products’ total_sales counter increases thanks to a core function. It’s then easy to retrieve the value and maybe show the number of sales on the single product page, which is great for social proof and sales conversion rate optimization.
The big problem – and don’t ask me why this is not into core – is that if you need to refund an order (or cancel it), the total_sales counter will not reset / decrease, which is odd.
Today we’ll fix this, so that your products are always up to date with their sales counter and you can be more confident in showing the correct values. Enjoy!
Continue reading WooCommerce: Decrease Product ‘Total Sales’ Upon Refund
Today’s customization will feature a custom shortcode that you can use to display content only to logged in customers: [customers-only]content for customers here e.g. video iframe[/customers-only]
This is perfect for membership sites, LMS platforms, paywalled content.
In my case, only premium Club members with a ‘CLASS’ pass can watch upcoming WooCommerce masterclasses and past recordings, so I needed the shortcode to hide the video to logged out users or logged in customers without a pass.
By wrapping the video iframe HTML inside the shortcode, I can show the video to logged in customers who purchased a given product ID, or alternatively show an error message, which you can see in action here, in the “The recording is now available!” section: https://www.businessbloomer.com/class/behind-the-scenes-how-i-run-business-bloomer/
So, how did I do it? Find out below, and hope you can use it too!
Continue reading WooCommerce: Conditionally Display Content to Customers [Shortcode]
So, I’ve built my own event management system for WooCommerce.
My objective was to embed a form on the event registration page, and then programmatically create a free WooCommerce order for that customer – so I can track the number of attendees (orders) and follow up with email automations (customers).
You can already see the system in action on the “How to Contribute to WooCommerce Core” event page: you can clearly see an email input and a “Register Now” button inside the “You’re invited” section. That’s the form – actually a Fluent Forms plugin contact form.
And then there is a simple snippet that hooks into the Fluent Form submission, and conditionally generates a WooCommerce order.
In this post, you’ll learn about a quick way to create a Fluent Forms form on your WordPress site, about the “fluentform/validate_input_item_input_email” hook, and finally about the wc_create_order() WooCommerce function that, of course, let us generate an order automatically. Enjoy!
Continue reading WooCommerce: Create Order From Contact Form Submission
The “Default sorting” dropdown sorts products by menu_order and then title on the WooCommerce Shop, Category and Tag pages.
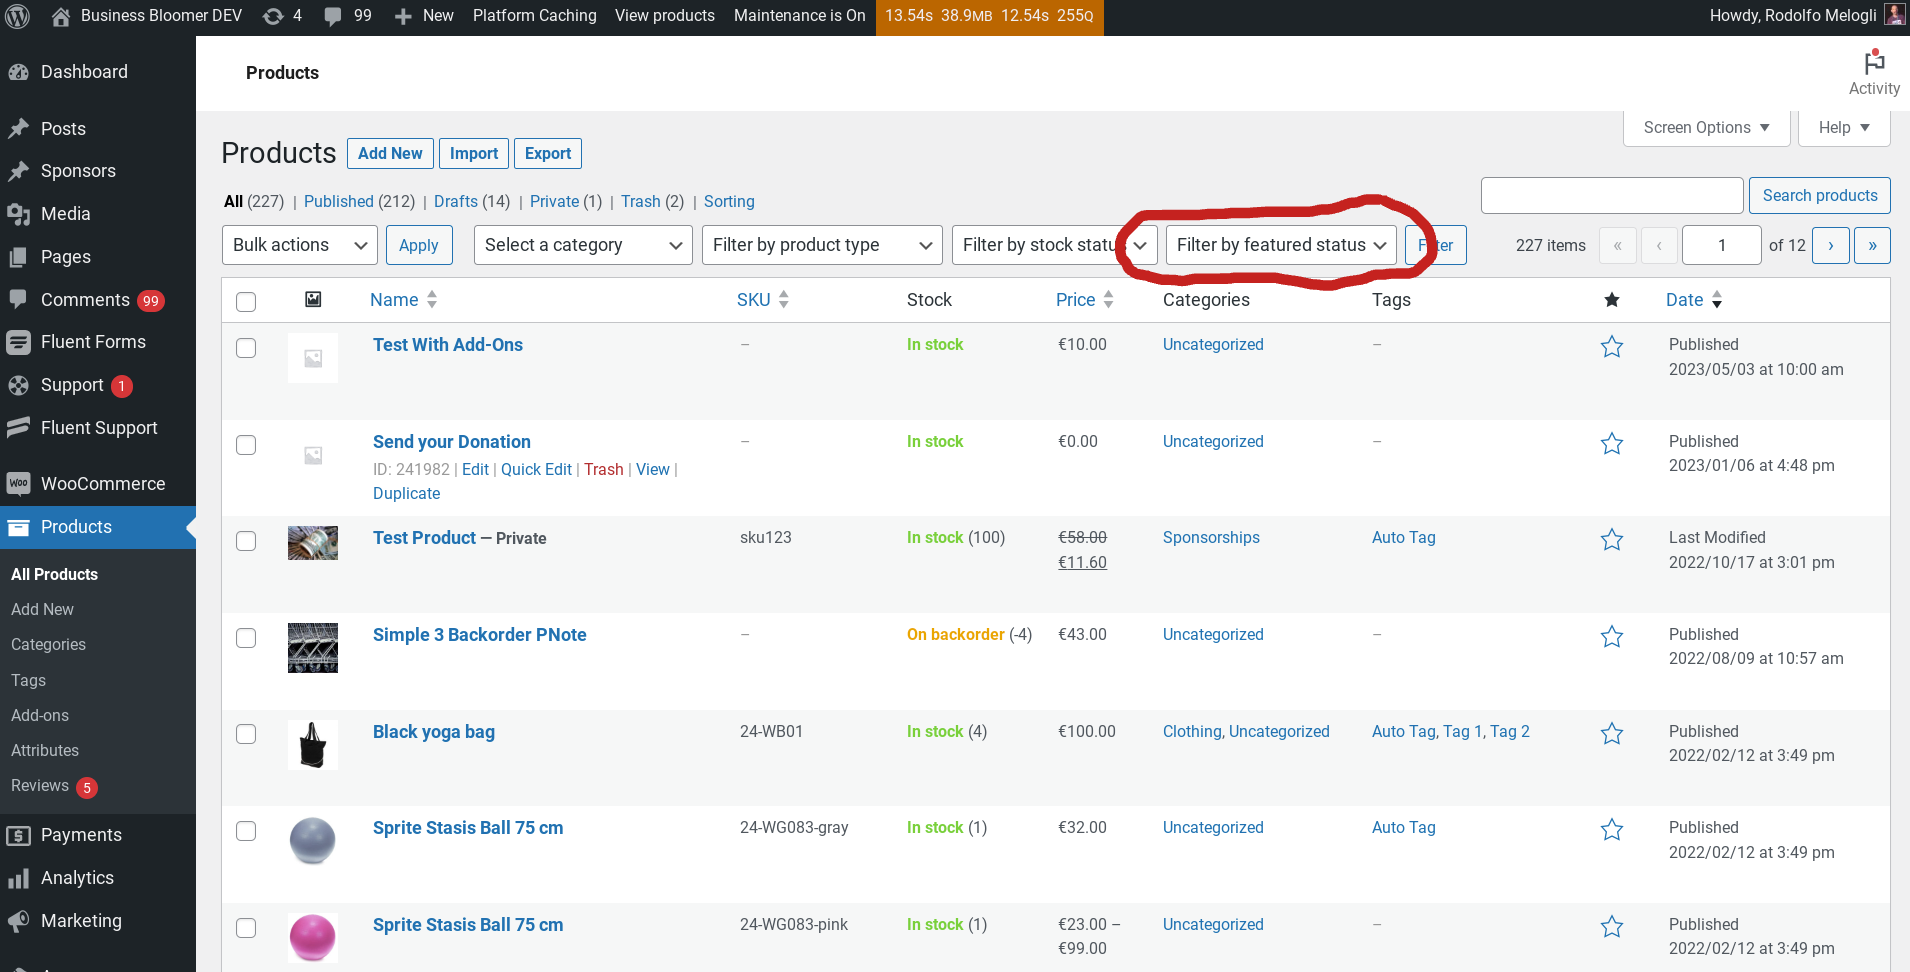
But what if you want to place the featured products first in the list (I mean, why would anyone set products as featured if you can’t really “promote” them on the Shop page)?
In today’s case study, we will replace the “Default sorting” option with a workaround, create a new one with the same label (so that customers won’t notice it), set it as the default sorting option, and make sure it sorts by featured products first, and then by menu_order and title. Enjoy!
Continue reading WooCommerce: Sort By Featured Products @ Shop
Here’s a great customization that all store managers should implement on their WooCommerce website!
For some reason you can refine the backend orders table if you are an admin, but logged in customers can’t filter by order status under My Account > Orders!
This is pretty bad, especially if you run a store where customers place many orders and the My Account Orders tab is full of entries. It may be helpful for customers to search all “Pending” orders for example, or maybe access al their “Completed” ones to download their files again.
So, here’s the fix – you’re welcome!
Continue reading WooCommerce: Filter By Order Status @ My Account Orders
When a WooCommerce product is set to “Sold Individually”, you can only add 1 item to the cart. If you try a second time, you will get the “You cannot add another “%s” to your cart” error message, so that the customer is aware that there is already that product in the cart.
However, you may want to either edit the message wording or completely remove it, especially if you automatically redirect to cart or checkout upon add to cart.
So, let’s study how to do the latter, which is much more complex than using the ‘woocommerce_cart_product_cannot_add_another_message‘ filter for editing the message content. Enjoy!
Continue reading WooCommerce: Disable “You cannot add another __ to your cart” Message
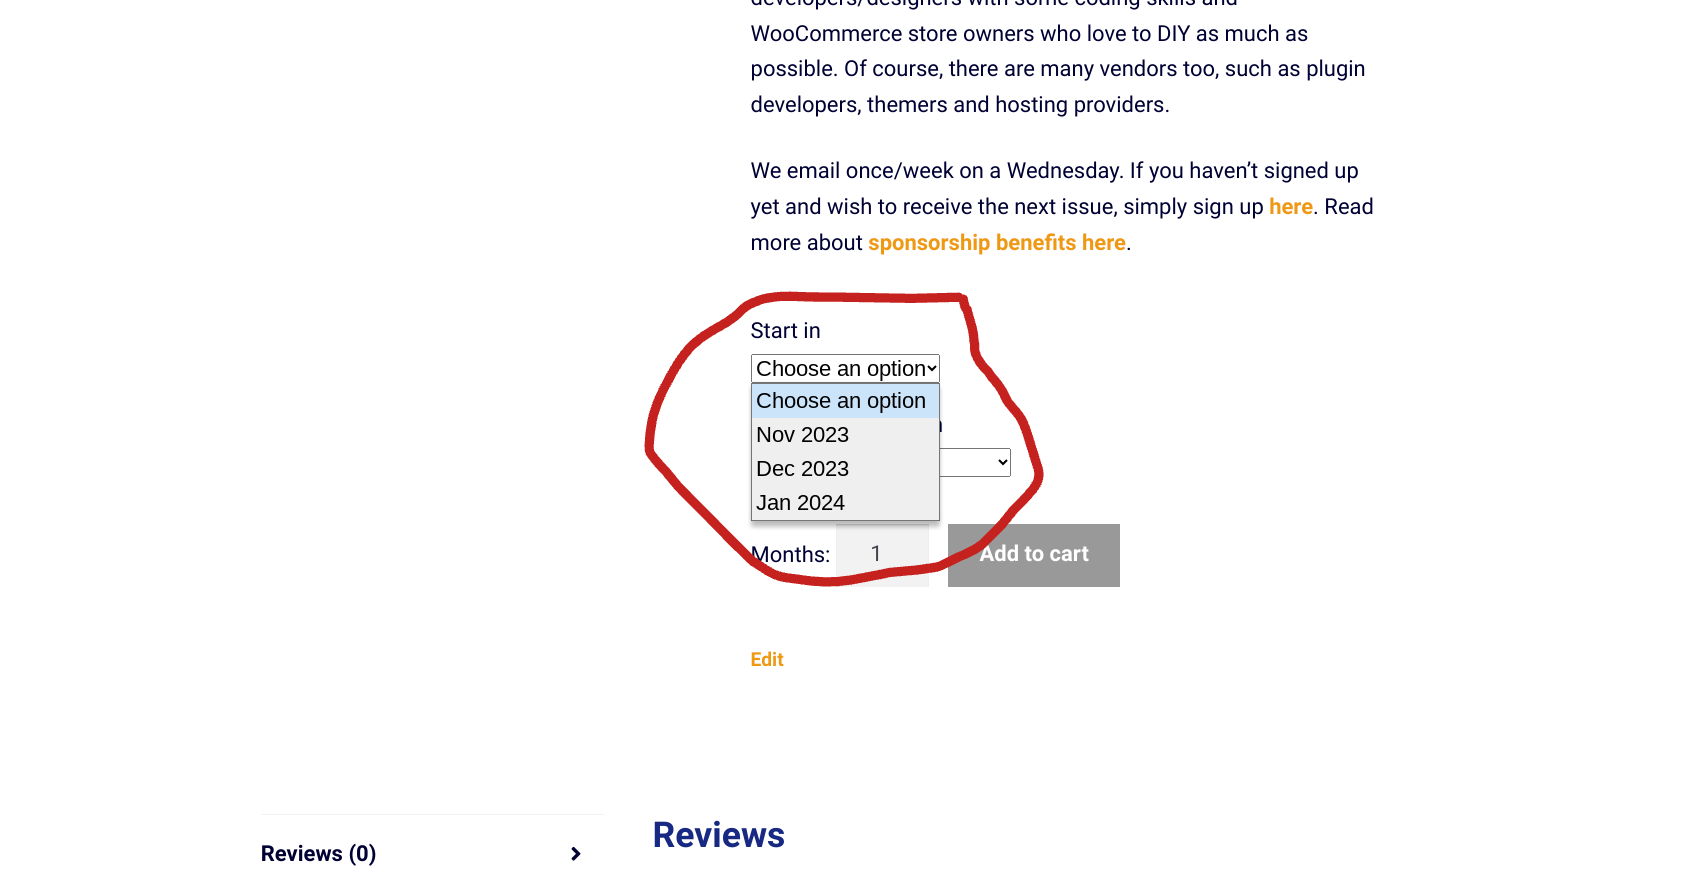
When a variable product stock quantity is managed at variation level, the stock status is either “In stock” or “Out of stock” without any mention of the quantity.
It would be cool, however, and in certain cases only, to show the total stock quantity for all single variations. If variation Red has 3 in stock, variation Blue has 7 in stock and variation Cyan has 10 in stock, I’d like to set the “parent product” stock quantity to 3 + 7 + 10 = 20.
So, how do we do that?
Continue reading WooCommerce: Variable Product “Cumulative” Stock Quantity
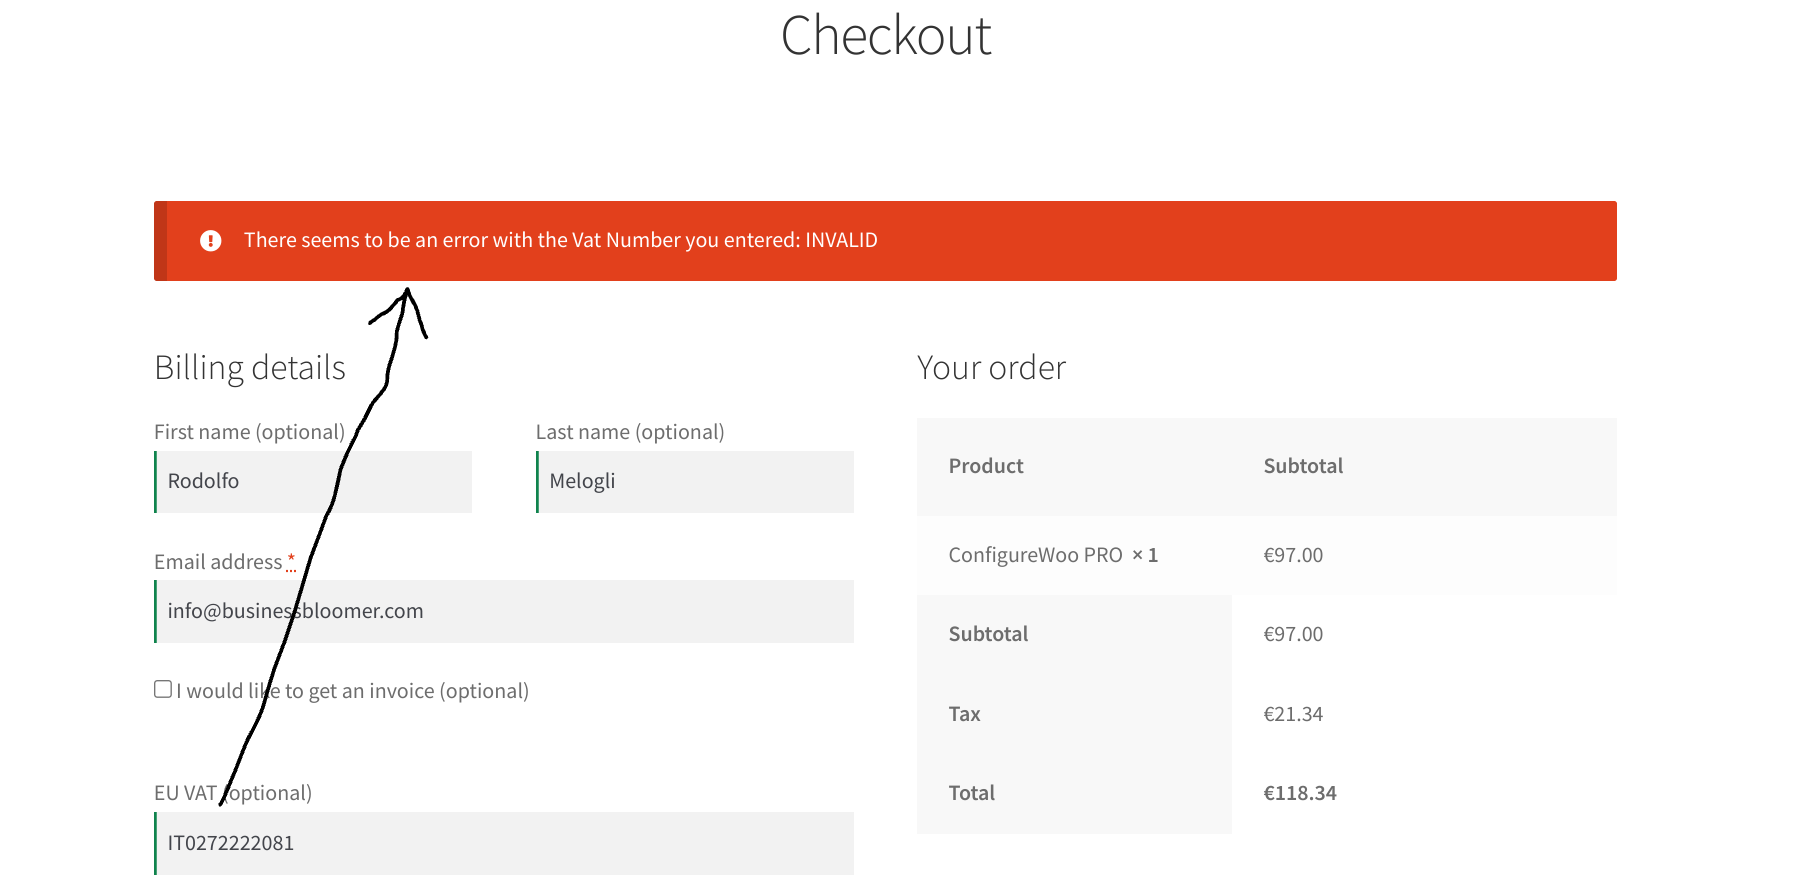
As an EU merchant dealing with VAT customers, I often find myself doing manual checks on the VIES VAT number validation website. Thankfully most of my customers are outside the EU so I don’t use the tool often, but still, for a developer this is just a waste of time!
By studying the available options on various online forums, I found a super simple workaround that doesn’t even require signing up for an API.
In fact, you can simply visit an URL and get the response straight away – which means we can access the same URL via PHP, get the response, and possibly return an error on the WooCommerce Checkout page in case the number is not valid.
Read on to find out how I use this validation on this same website.
Continue reading WooCommerce: Super Simple EU Vat Number Validation (VIES)