WooCommerce: Move Email Field to Top @ Checkout

This tutorial is a spin-off of a previous article (WooCommerce: Move / Reorder Checkout Fields) as I feel there is a huge boost of requests for this task alone.

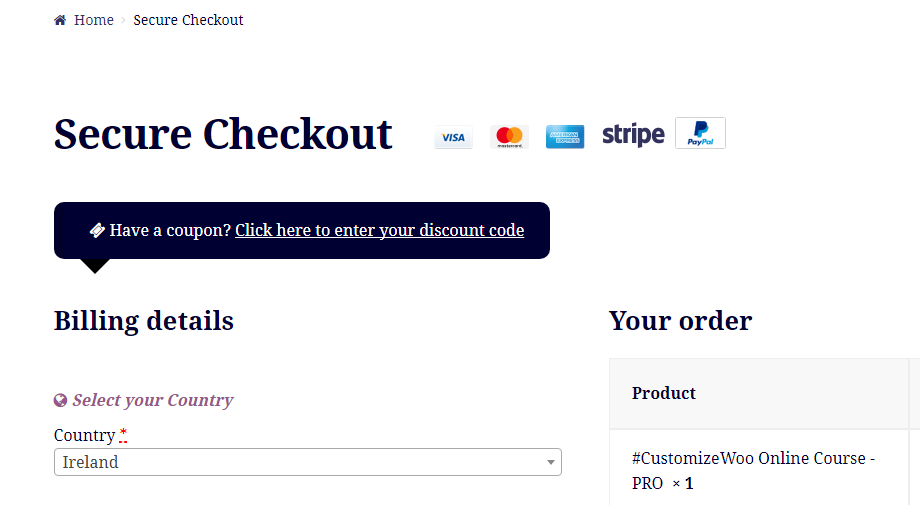
Moving the billing email field to the top of the WooCommerce checkout gives you many benefits: because it’s the first field customers need to fill out, you can capture their email address (upon marketing permission) and send them cart reminders, feedback requests and similar if they do not complete the checkout.

Also, having the email first can make you save time in case the user is already registered, and you could save them time while checking this against the list of customers, so a prompt can be displayed to load all their billing/shipping details for example.

Either way, it’s super easy to move the email field to the top. Enjoy!

Continue reading WooCommerce: Move Email Field to Top @ Checkout

WooCommerce: Checkout Test Automation 101

E2E Checkout Testing

Testing the WooCommerce checkout is extremely important for your ecommerce business.

Every time you install a new plugin or update WordPress you might run into issues: for example, the cart and payment pages could stop working until you fix the problem.

You donโ€™t want to lose sales and undermine your website reputation, do you? So you must test all the WooCommerce processes on a regular basis, also called “end to end” (E2E) testing.

But how can you do that without wasting too time?

Spoiler alert: simply create an automated test, and let the robot test your WooCommerce website on a regular basis, so that you never have to worry about doing it manually.

Luckily for you, there are some great tools – such as the two you will soon read about – and WooCommerce professionals that can do it for you on a daily or whatever basis.

Here’s your quick introduction to setting up your checkout test automation.

Cheers to a checkout page that works 365 days a year.

Continue reading WooCommerce: Checkout Test Automation 101

WooCommerce: Maxlength and Minlength for Checkout Fields

If you’re familiar with HTML, you can add “maxlength” and “minlength” attributes to an input field in order to force its value to be min X and max Y characters long. This is all good and easy, so we might as well see what happens on the WooCommerce Checkout page once we apply such attributes to a given custom field.

Spoiler alert: maxlength works, while minlength does not. Hence, forcing a given checkout field to have a minimum length is actually quite impossible, unless we validate the posted data (a field input value that is not long enough) once the checkout is submitted. That’s a bummer, and in this article I will also explain how to contact WooCommerce so they can improve a functionality / fix a bug.

Enjoy!

Continue reading WooCommerce: Maxlength and Minlength for Checkout Fields

WooCommerce: How to Customize Checkout For Conversions

I had the honor to speak at WCEU 2020 thanks to WooCommerce, who hosted me in their Sponsor track. It was a short and sweet lightning talk on the first day (Friday), called “Customizing The WooCommerce Checkout To Improve Conversions“, followed by a live coding session on Saturday.

Here’s the video recording of the lightning talk, as well as a few PHP and CSS snippets you can copy/paste to improve your WooCommerce Checkout and immediately expect an increase in conversion rate. So, enjoy the video and then go test the snippets you find below!

Continue reading WooCommerce: How to Customize Checkout For Conversions

WooCommerce: Show SKU @ Cart, Checkout, Order & Emails

When SKU matters to the end user, displaying it in the Cart page, Checkout page, Thank you page, My Account View Order page and Order Emails under the item name is a must.

Ideal for B2B businesses and international brands, this simple customization can help you learn how to add any sort of content under the Cart/Checkout/Order item names. Simply use the same hook and try “getting” something different than SKU with this guide. Enjoy!

Continue reading WooCommerce: Show SKU @ Cart, Checkout, Order & Emails

WooCommerce: Dynamically Hide / Show Checkout Field

We already saw a lot of examples e.g. hiding checkout fields if a product is virtual or hiding checkout fields if a checkbox is manually checked… but this time I want to hide a field dynamically – automatically – based on whether another checkout field is empty or has a specific value.

In this example, I will demonstrate how to hide the “billing phone” if “billing company” is empty or no information is entered. Of course, you also have to disable the mandatory attribute for the billing phone from the Customizer settings, otherwise checkout validation will fail. You can readapt this snippet to any other checkout field combo – just identify the input IDs and change jQuery accordingly. Enjoy!

Continue reading WooCommerce: Dynamically Hide / Show Checkout Field

WooCommerce: Move Order Notes @ Checkout

We already saw how to hide Order Notes on the WooCommerce checkout page. This time around, however, our goal is to “move” them – and specifically remove them from their default position (under the shipping form) and add them back under the billing form.

As you can imagine, this is a combo snippet: (1) we remove them (and we’ll use the snippet as per the link above) and (2) we create a new billing field. Finally, (3) we also need to “save” this new field value into the original order notes custom field meta.

If this is difficult to understand don’t worry – just copy/paste the snippet into your functions.php and see magic happen. Enjoy!

Continue reading WooCommerce: Move Order Notes @ Checkout

WooCommerce: Show Checkout Even If Cart Is Empty

By default, the WooCommerce Checkout page redirects you back to the (empty) Cart page in case there are no products in the Cart.

Now, there are times when you still need users to see the Checkout page and avoid this redirect. And thankfully, WooCommerce provides us with two filters that we can use to immediately disable this default behavior. Enjoy!

Continue reading WooCommerce: Show Checkout Even If Cart Is Empty

WooCommerce: Add Shipping Phone @ Checkout

I’m surprised WooCommerce doesn’t offer this field out of the box. Most ecommerce websites actually require a shipping phone to organize delivery and communicate with the end customer in case there are problems.

Thankfully, there is a hook (filter) for that. It’s called “woocommerce_checkout_fields” and can be used to remove, move or add checkout fields quickly. And here’s how to add, for example, a new shipping field called “shipping_phone”. Enjoy!

Continue reading WooCommerce: Add Shipping Phone @ Checkout

WooCommerce: Add Upsell Area @ Checkout Page

If you want to increase your AOV (Average Order Value), you can definitely start from the WooCommerce Checkout page.

A client asked me to place a “Donation Area” close to the “Place Order” button (so at the bottom of the page, once customers are ready to pay) to drive more awareness around this add-on. All I had to do was creating hidden products with a donation value, use my own “Custom Add to Cart URL” guide to create add to cart links and print an HTML box right above the checkout button by using my WooCommerce Visual Hook Guide for the Checkout Page. Enjoy!

Continue reading WooCommerce: Add Upsell Area @ Checkout Page

WooCommerce: Set Checkout Field Value @ Order Creation

This is a very specific function. Sometimes, you need to “set” a checkout field value upon order creation (because it was not required and left empty for example). In some other cases, you might want to override what the customer input if you have certain requirements.

Either way, overriding the checkout fields on order creation is super easy. Here’s how it’s done – enjoy!

Continue reading WooCommerce: Set Checkout Field Value @ Order Creation

WooCommerce: Display Required Field Errors “Inline” @ Checkout

If you’re familiar with the upcoming Gutenberg editor, you’ll know there have been a million doubts in regard to accessibility. So, accessibility matters – and WooCommerce has a few issues as well.

One interesting accessibility fix is the error notification system on the checkout page. Yes, the missing fields error show on top of the page when trying to place an order, but once you scroll down to fill them out again you might need a reminder of which field is missing without having to scroll back up to check the error.

This is quite difficult to explain, so take a look at the screenshot. The suggestion here is to also add “inline” error notifications (“XYZ is a required field“) right above each field, so that the user knows exactly what to do. So, let’s see how it’s done.

Continue reading WooCommerce: Display Required Field Errors “Inline” @ Checkout

WooCommerce: Move / Remove Coupon Form @ Cart & Checkout

Coupons: the good, the bad and the ugly. WooCommerce coupon codes are great to convert more sales – but sometimes they get users to pause / stop placing the order until they find a coupon code online (you did it too, I know).

One good workaround that the internet giants such as Amazon and eBay have implemented is to hide the coupon form until an email is entered, or alternatively to move the coupon code to the bottom of the Checkout page. This is a very smart move, and gets the user to concentrate on the Cart / Checkout details before entering or searching for a coupon.

So the question is – how to remove the coupon form in the Cart page and how to move the same to the bottom of the Checkout page? Well, as usual, a bit of PHP can help us. Here’s how it’s done!

Continue reading WooCommerce: Move / Remove Coupon Form @ Cart & Checkout

WooCommerce: Cart and Checkout on the Same Page

This is your ultimate guide – complete with shortcodes, snippets and workarounds – to completely skip the Cart page and have both cart table and checkout form on the same (Checkout) page.

But first… why’d you want to do this? Well, if you sell high ticket products (i.e. on average, you sell no more than one product per order), if you want to save an additional step (two steps convert better than three: “Add to Cart” > “Cart Page” > “Checkout Page” – and this is not rocket science), if your custom workflow and ecommerce objectives require you to manage Cart and Checkout all together, well, this tutorial is for you.

There is a mix of shortcodes, settings and PHP snippets you can use to make this work out of the box. And trust me, this is easier than you think.

While many developers decide to turn the checkout process into a “Multi-Step Checkout” (ehm, not sure why – the more steps the more likely it is to have a cart abandonment), in here we’ll see the exact opposite.

So, how do they do it?

Here’s the complete, easy, step by step guide to put Cart & Checkout on the same page. Give it a go, do some WooCommerce testing and tracking, and see if it converts better ๐Ÿ™‚

Continue reading WooCommerce: Cart and Checkout on the Same Page

WooCommerce: Add Checkout Fees Based on Custom Radio Button

This is a great WooCommerce snippet (or plugin, if you wish to call it like that) for those who want to provide conditional checkout fees. For example, you might need to display custom checkout radio buttons to pick premium packaging types, gift wrapping options, specific services or whatever can increase your AOV (Average Order Value).

Radio button selection must work with “Ajax” – which means as soon as the radio button is chosen, checkout must refresh in order to display the updated fees and totals.

Something similar (and also more complex, such as offering additional products) is achieved by the WooCommerce Checkout Add-Ons Plugin sold on the official WooCommerce.com marketplace. But in this case, we want to take a look at custom coding so you’ve got something to play with! Enjoy.

Continue reading WooCommerce: Add Checkout Fees Based on Custom Radio Button

WooCommerce: Hide Checkout Fields if Virtual Product @ Cart

If you sell downloadable/virtual products and need to simplify your WooCommerce checkout when such product type is in the Cart, you’ve come to the right place!

Here’s a simple snippet, as well as a handy mini-plugin, that checks if there are only “virtual” products in the Cart and hides all the billing fields and order notes (except name and email).

The mini-plugin also allows you to enable this for free virtual orders only, and to move the relevant billing fields under a toggle instead of removing them all together.

Enjoy!

Continue reading WooCommerce: Hide Checkout Fields if Virtual Product @ Cart

WooCommerce: Rename “Place Order” Button @ Checkout

The “Place Order” button is the call to action you want ALL customers to take, right? Well, changing its label to a more specific, custom message could mean a small increase in sales conversion.

Thankfully, you can try this with as low as 4 lines of PHP, even if you don’t know coding. Just copy and paste the snippet by following the instructions below and give your unique store a unique checkout message ๐Ÿ™‚

Continue reading WooCommerce: Rename “Place Order” Button @ Checkout

WooCommerce: Save “Terms & Conditions” Acceptance @ Checkout

When going legal… you need proof. Accepting the “Terms and Conditions” on the checkout is required in order to place an order – but how can you, WooCommerce store admin, “prove” that the Terms and Conditions were actually ticked by the customer?

One of the solutions might be to save such acceptance in the database and print the acceptance on the order admin (and maybe on the customer invoice as well). So, here’s a quick PHP snippet you can simply copy and paste in your child theme’s functions.php file in order to (1) save and (2) print the choice on the Single Order Admin page. Enjoy!

Continue reading WooCommerce: Save “Terms & Conditions” Acceptance @ Checkout

WooCommerce: Change Autofocus Field @ Checkout

If you decide to delete or reorder checkout fields, you probably also need to change the checkout field with “autofocus”. In plain English, this is the checkout field where the keyboard cursor goes automatically to on checkout page load (by default, this is the Billing First Name).

As usual, changing this default behavior is very easy, even if you’re not familiar with PHP. In the example below, I’m removing the autofocus from Billing First Name and assigning it to the Billing Email field instead.

Copy the snippet, test it on your development environment and only then push it to your live website. Enjoy! Continue reading WooCommerce: Change Autofocus Field @ Checkout