So, we all know that the “Store Address” fields under WooCommerce > Settings > General are used by other WooCommerce functions such as the initial setup wizard, currency switchers, language plugins as well as taxes and shipping calculations. Also, it may display on PDF invoices, WooCommerce emails and static pages.
This is all good and easy, but as usual businesses are not made equal. It could be that you need to show an additional address; for example, the “Warehouse Address”.
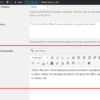
In this tutorial, we will add a new “Warehouse Address” section and address fields under the “Store Address” settings, and also see how we can easily retrieve this custom address so that you can display it anywhere. Enjoy!

PHP Snippet: Second Store Address @ WooCommerce > Settings > General
/**
 * @snippet       Second Address @ WooCommerce Settings
 * @how-to        businessbloomer.com/woocommerce-customization
 * @author        Rodolfo Melogli, Business Bloomer
 * @compatible    WooCommerce 7
 * @community     https://businessbloomer.com/club/
 */

add_filter( 'woocommerce_general_settings', 'bbloomer_additional_store_addresses_admin', 9999 );

function bbloomer_additional_store_addresses_admin( $settings ) {

	$new_settings = array(

		array(
			'title' => 'Warehouse Address',
			'type'  => 'title',
			'id'    => 'wh_address',
		),

		array(
			'title'    => __( 'Address line 1', 'woocommerce' ),
			'id'       => 'woocommerce_wh_address',
			'type'     => 'text',
		),

		array(
			'title'    => __( 'Address line 2', 'woocommerce' ),
			'id'       => 'woocommerce_wh_address_2',
			'type'     => 'text',
		),

		array(
			'title'    => __( 'City', 'woocommerce' ),
			'id'       => 'woocommerce_wh_city',
			'type'     => 'text',
		),

		array(
			'title'    => __( 'Country / State', 'woocommerce' ),
			'id'       => 'woocommerce_wh_country',
			'type'     => 'single_select_country',
		),

		array(
			'title'    => __( 'Postcode / ZIP', 'woocommerce' ),
			'id'       => 'woocommerce_wh_postcode',
			'type'     => 'text',
		),

		array(
			'type' => 'sectionend',
			'id'   => 'wh_address',
		),

   );

	return array_merge( array_slice( $settings, 0, 7 ), $new_settings, array_slice( $settings, 7 ) );

}
You’re wondering how I came up with the code above? Well, I simply found out how the General Settings are output by WooCommerce, found the handy woocommerce_general_settings filter, and copied the whole “Store Address” section after changing the fields’ ID.
Finally, I used a combination of array_slice and array_merge to position the new section exactly after the Store Address one.
The great thing is that no code is needed to “save” these new fields, WooCommerce does it already for you. Which means you can retrieve the new address in this way:
$warehouse_address = get_option( 'woocommerce_wh_address', '' );
$warehouse_address_2 = get_option( 'woocommerce_wh_address_2', '' );
$warehouse_city = get_option( 'woocommerce_wh_city', '' );
$warehouse_country = get_option( 'woocommerce_wh_country', '' );
$warehouse_zip = get_option( 'woocommerce_wh_postcode', '' );