In this million-dollar tutorial you will learn how to update a custom (WooCommerce) plugin that you host somewhere, directly from the WordPress dashboard.
I thought the WordPress dashboard could only notify you of plugin updates and let you exclusively update plugins that are on the WordPress repository, but I was wrong!
Since I started selling WooCommerce plugins here on Business Bloomer, I had to find a way to let customers update them automatically right from their WP admin.
Thankfully, there are 2 hooks that come to the rescue: pre_set_site_transient_update_plugins update_plugins_{$hostname} and plugins_api. With these two filters, you can tell WordPress that your custom plugin ZIP file is downloadable at a given public URL, show a notification to the customer that a plugin update is available, let them update with 1 click, and optionally let them enable auto-updates.
So, let’s see how I run my plugin business. Enjoy!

Step 1: Create & Host the Custom Plugin
This post is not about developing plugins. Feel free to study the WordPress Plugin Handbook in case you’re starting out now.
Once you have completed the development, save the plugin ZIP file at a public URL e.g.: www.businessbloomer.com/blabla/whatever-plugin.zip
Step 2: Create a JSON Changelog File
When you self-host the plugin, we need to notify WordPress (and all WordPress websites where the plugin is installed) that there is a new version available, otherwise the code you find at Step 4 won’t trigger.
You can use several ways of storing the changelog data, and creating a JSON file is the easiest one. All WordPress needs is to retrieve the ZIP file name and the plugin version, so that it can get them dynamically and trigger the update notification.
Open a text editor, and enter the following information:
{
	"plugin_name": "Whatever Plugin For WooCommerce",
	"latest_version": "1.0.9",
	"download_url": "https://www.businessbloomer.com/blabla/whatever-plugin.zip",
}
Then, save the file with the .JSON extension, and place this at a specific URL of your own website e.g. www.businessbloomer.com/blabla/plugin-updates.json
Keep this file updated whenever you release a new plugin version e.g. as soon as you upload version 2.0.0 of the plugin, change the JSON file to:
{
	"plugin_name": "Whatever Plugin For WooCommerce",
	"latest_version": "2.0.0",
	"download_url": "https://www.businessbloomer.com/blabla/whatever-plugin.zip",
}
Step 3: Install the Custom Plugin on any WordPress Site
Go to WordPress > Plugins > Add New > Upload and install and activate the custom plugin. This plugin will come with a version number e.g. 1.0.9 – we now need to find a way for admins to update the plugin in case a newer version is available.
Step 4: PHP Snippet – Update the Custom Plugin From The WordPress Dashboard
This is the cool part.
You can add this to the plugin code.
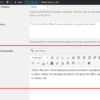
We will use two filters: update_plugins_{$hostname} and plugins_api. The former is responsible for the actual update; the latter shows the plugin information when “View version details” is clicked (see screenshot above).
Note 1: the {$hostname} part is based on where you host the plugin. Let’s say the plugin URL is www.businessbloomer.com/blabla/whatever-plugin-1.0.9.zip, then the {$hostname} is www.businessbloomer.com
Note 2: you need to know, also, the name of the plugin folder, and the name of the plugin file, which are usually the same. If the ZIP file is whatever-plugin.zip I expect that the plugin folder is called /whatever-plugin and that the plugin file contained within is called /whatever-plugin.php
Note 3: the plugin file must use the “Plugin URI” and “Version” header parameters, because we’ll retrieve them via code.
/**
 * @snippet       Update Self-Hosted Plugin @ WordPress Dashboard
 * @how-to        businessbloomer.com/woocommerce-customization
 * @author        Rodolfo Melogli, Business Bloomer
 * @compatible    WooCommerce 7
 * @community     https://businessbloomer.com/club/
 */

// ----------------
// 1: Plugin Description When People Click On View Version Details
// Note: use the plugin slug, path, name

add_filter( 'plugins_api', 'bbloomer_plugin_view_version_details', 9999, 3 );

function bbloomer_plugin_view_version_details( $res, $action, $args ) {
	if ( 'plugin_information' !== $action ) return $res;
	if ( $args->slug !== 'whatever-plugin' ) return $res;
	$res = new stdClass();
	$res->name = 'Whatever Plugin For WooCommerce';
	$res->slug = 'whatever-plugin';
	$res->path = 'whatever-plugin/whatever-plugin.php';
   $res->sections = array(
		'description' => 'The plugin description',
	);
   $changelog = bbloomer_whatever_plugin_request();
	$res->version = $changelog->latest_version;
	$res->download_link = $changelog->download_url;
	return $res;
}

// ----------------
// 2: Plugin Update
// Note: use the plugin {$hostname}, slug & path

add_filter( 'update_plugins_www.businessbloomer.com', function( $update, array $plugin_data, string $plugin_file, $locales ) {
	 if ( $plugin_file !== 'whatever-plugin/whatever-plugin.php' ) return $update;
    if ( ! empty( $update ) ) return $update;
    $changelog = bbloomer_whatever_plugin_request();
    if ( ! version_compare( $plugin_data['Version'], $changelog->latest_version, '<' ) ) return $update;
    return [
        'slug' => 'whatever-plugin',
        'version' => $changelog->latest_version,
        'url' => $plugin_data['PluginURI'],
        'package' => $changelog->download_url,
    ];
}, 9999, 4 );

// ----------------
// 3: Retrieve Plugin Changelog
// Note: use the public JSON file address

function bbloomer_whatever_plugin_request() {
    $access = wp_remote_get( 'https://www.businessbloomer.com/blabla/plugin-updates.json', array( 'timeout' => 10,	'headers' => array( 'Accept' => 'application/json' )	) );
    if ( ! is_wp_error( $access ) && 200 === wp_remote_retrieve_response_code( $access ) ) {
			$result = json_decode( wp_remote_retrieve_body( $access ) );
			return $result;
    }
}
Recap
In order to let a WordPress user update a plugin that you host somewhere else, you need:
- to develop the plugin as per Step 1 (naming) and Step 4 (plugin update requirements)
- to save the ZIP file on a public URL, so that WordPress can download it
- to keep a JSON changelog file on a public URL, so that WordPress knows if there is an update available
Questions? Doubts? Feedback? Leave a comment below!


Greetings. This is a fantastic and truly million-dollar tutorial that you have generously released for free. And this is a sign of your greatness.
It would be great if you explained the license in another post. How to make our own plugin have a license and time limit or other restrictions, and if they buy, they have to renew, or if they don’t renew, the plugin will stop working and they will be warned before it ends, and things like that related to the license discussion for It becomes a plugin.
Thank you – I think once you start talking about licencing, DYI is not a good idea. The likes of Freemius, EDD, etc. would probably work better
Love that answer – sharing is sharing, and try to contribute insteed off asking how to make it you own is most importent.
I think Rodolfo is doing a great job, whith sharring, relavant topics.
If you want to make them your own, then go learn .php and make it yourself …