In the world of WooCommerce, customization is crucial for creating a unique online store. However, juggling numerous WooCommerce settings across multiple pages can be tedious.
Imagine a solution that simplifies this process by consolidating all your WooCommerce options into a single, easy-to-use interface.
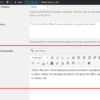
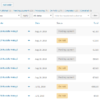
This tutorial will give you a possible approach and try to fit all WooCommerce Settings into a single screen (so, on the same page, you can edit the general, products, shipping, payments, advanced, etc. options).
Enjoy!

PHP Snippet: All WooCommerce Settings In One Page
Please note that the solution below still doesn’t work with subtabs (e.g. they redirect to the actual subtab page), but at least the parent tabs (General, Products, etc.) are working fine. If you wish to complete the code, feel free to contribute.
/**
 * @snippet       1-page Woo Settings layout
 * @how-to        businessbloomer.com/woocommerce-customization
 * @author        Rodolfo Melogli, Business Bloomer
 * @testedwith    WooCommerce 9
 * @community     https://businessbloomer.com/club/
 */

add_action( 'woocommerce_before_settings_general', 'bbloomer_woo_settings_tabs_navbar_replacement' );

function bbloomer_woo_settings_tabs_navbar_replacement() {

	$tabs = apply_filters( 'woocommerce_settings_tabs_array', [] );

	?>
		<nav class="nav-tab-wrapper woo-nav-tab-wrapper infinite">
			<?php

			foreach ( $tabs as $slug => $label ) {
				echo '<a href="#' . $slug . '" class="nav-tab">' . esc_html( $label ) . '</a>';
			}

			?>
		</nav>

		<style>
				.woocommerce nav.woo-nav-tab-wrapper:not(.infinite) { display: none }
				.woocommerce nav.woo-nav-tab-wrapper.infinite { background: Cornsilk; box-sizing: border-box; padding: 5px; position: sticky; top: 50px; z-index: 1001; margin: 0; width: calc(100% - 100px); }
		</style>

	<?php
}

add_action( 'woocommerce_after_settings_general', 'bbloomer_display_settings_tabs_content_after_general_one' );

function bbloomer_display_settings_tabs_content_after_general_one() {

	$tabs = apply_filters( 'woocommerce_settings_tabs_array', [] );
	unset( $tabs['general'] );

	foreach ( $tabs as $current_tab => $label ) {

		echo '<hr id="' . $current_tab . '">';
		echo '<h1 style="text-transform:capitalize">' . $label . ' ' . __( 'Settings', 'woocommerce' ) . '</h1>';

		// SAVE SETTINGS
		if ( ! empty( $_POST[ 'save' . $current_tab ] ) ) {
			check_admin_referer( 'woocommerce-settings' );
			do_action( 'woocommerce_settings_save_' . $current_tab );
			do_action( 'woocommerce_update_options_' . $current_tab );
			do_action( 'woocommerce_update_options' );
			update_option( 'woocommerce_queue_flush_rewrite_rules', 'yes' );
			WC()->query->init_query_vars();
			WC()->query->add_endpoints();
			do_action( 'woocommerce_settings_saved' );
		}

		do_action( 'woocommerce_before_settings_' . $current_tab );
		?>
			<form method="<?php echo esc_attr( apply_filters( 'woocommerce_settings_form_method_tab_' . $current_tab, 'post' ) ); ?>" id="mainform<?php echo $current_tab; ?>" action="" enctype="multipart/form-data">
		<?php
		do_action( 'woocommerce_sections_' . $current_tab );
		do_action( 'woocommerce_settings_' . $current_tab );
		?>
			<p class="submit">
				<button name="save<?php echo $current_tab; ?>" class="woocommerce-save-button components-button is-primary" type="submit" value="<?php esc_attr_e( 'Save changes', 'woocommerce' ); ?>"><?php esc_html_e( 'Save changes', 'woocommerce' ); ?></button>
				<?php wp_nonce_field( 'woocommerce-settings' ); ?>
			</p>
			</form>
		<?php
		do_action( 'woocommerce_after_settings_' . $current_tab );

	}

}


Thanks really useful.