If you’ve experienced the difficulty and high cost of acquiring new customers, you’re not alone. The estimated probability of selling to a new prospect is only five to 20 percent. Compare that to the probability of selling to an existing customer: 60 to 70 percent.
That’s not all. Depending on your business and your industry, it can be five to 25 times more expensive to acquire a new customer than it is to retain one you already have. That’s despite all your pre-sales preparation.
As you can see, retaining your existing customers – or those who show an intent to buy – is paramount. How to increase revenue from them, however, continues to elude many businesses.
Fortunately, it doesn’t need to be hard. With the help of WooCommerce, you can easily create personalized recommendations to attract more sales from customers who are already interested in your offerings.
Using customized recommendations works to your advantage as internet users have grown fond of personalization. In fact, ninety percent of customers find personalization of their shopping journey appealing, and 71 percent feel at least some frustration when the experience is totally impersonal.
In this post, we’ll take a closer look at cross-selling and its benefits. We’ll also show you how you can create an effective strategy for your online store, using the WooCommerce Added to Cart trigger in MailOptin. Let’s get started!
What Cross-Selling Is (And How It Can Boost Your Profits)
If you’ve ever walked into a restaurant for a burger but walked out with fries too, you’ve participated in the cross-selling process. “Would you like fries with that?” is an effective question.
Cross-selling means offering a product or service in addition to what the customer intends to buy. You can do that by suggesting an item that complements the original one, or completes a bundle.
Cross-selling can increase sales by 20 percent. Research also shows that an estimated 75 percent of customers are more likely to purchase a product when it’s presented as a personalized recommendation.
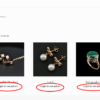
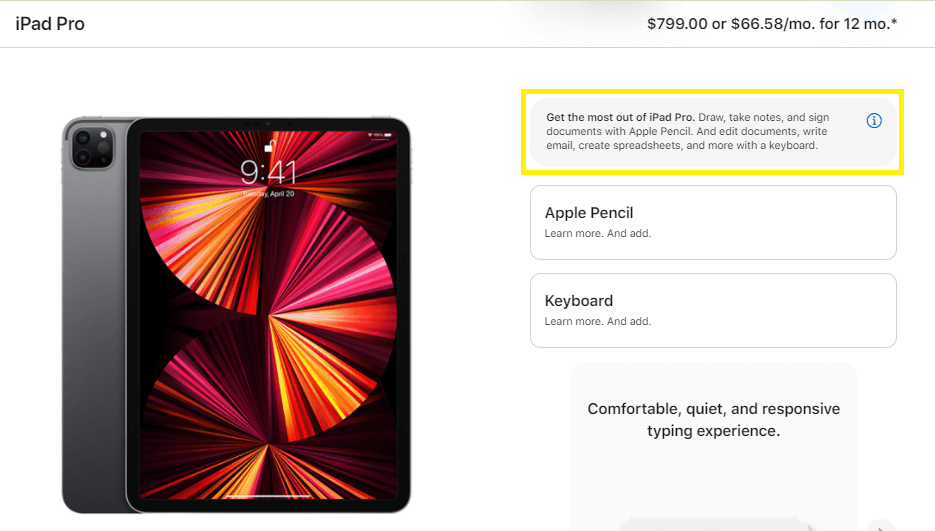
You can cross-sell on your online store by offering relevant product recommendations. Here’s an example from Wayfair:
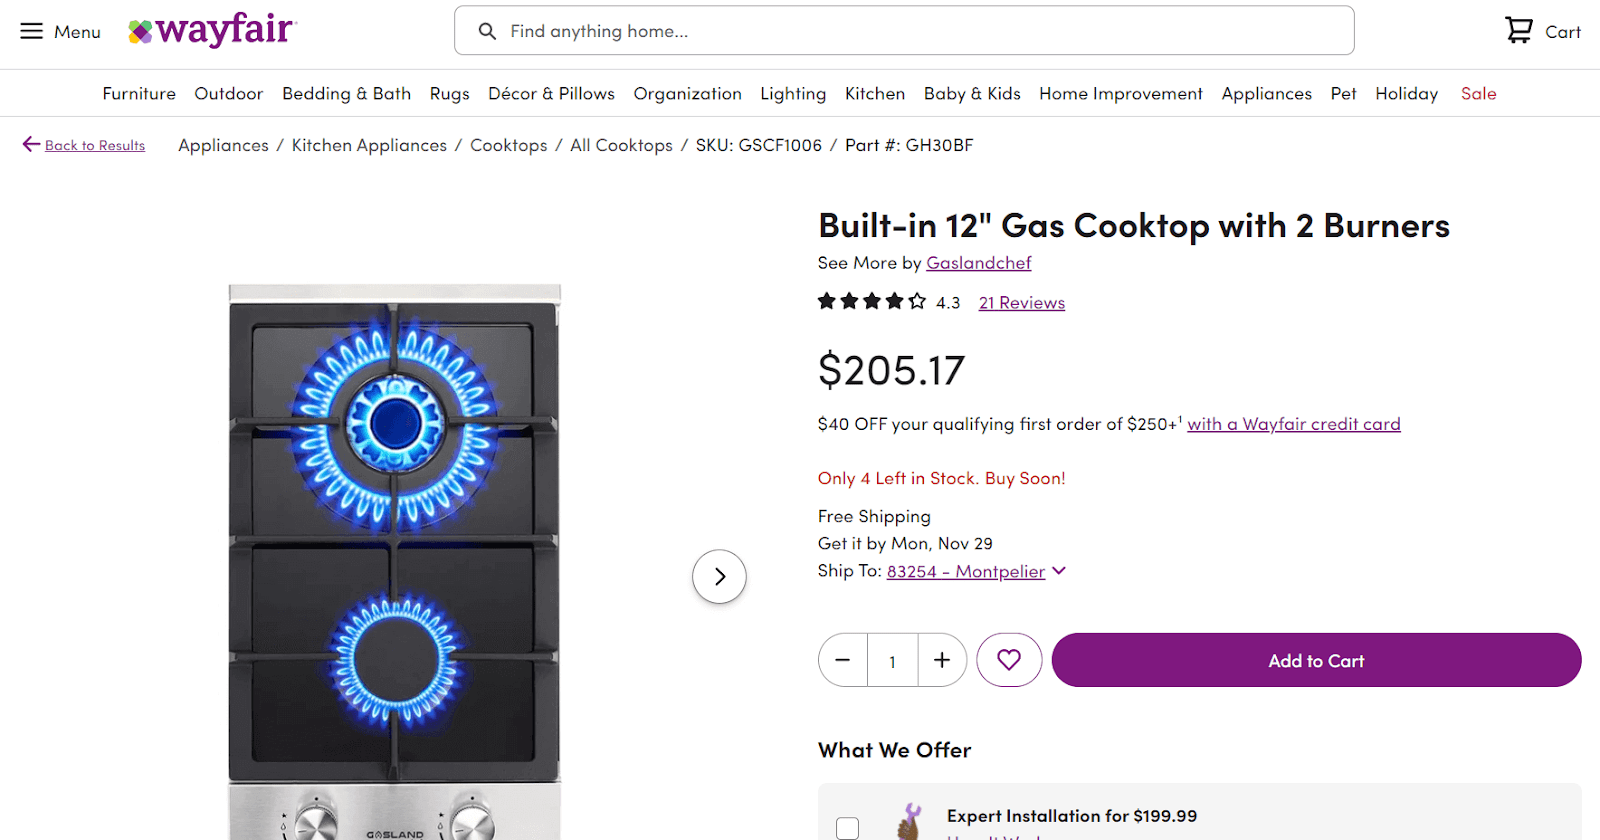
On the product page, you’ll find some some suggestions:

Note that this strategy is different from the upselling technique. Upselling means offering the customer a similar item that is more expensive than the one they intend to buy. With cross-selling, you are offering customers an ‘add-on’ product that will complement their original choice.
A Few Tips for Creating an Effective Cross-Sell Strategy
To be effective at cross-selling, it’s important that you get to know your target audience. You’ll need to look at their needs, wants, and decision triggers so you can make helpful and relevant recommendations.
Moreover, you’ll want to make it easy for the customer to act on the cross-sell. For example, you can display a pop-up button that the customer can click on to add the product to their cart.
Creating a sense of urgency by limiting the time window or availability of the offering can further prompt the customer to purchase an additional product. Furthermore, you can leverage social proof by showing that your recommendation is popular with other customers.
Notification bars, pop-ups, and slider boxes are all effective ways to cross-sell your products. The good news is that you can easily add one or more of these to your store. All you need is a powerful plugin, like MailOption.
How to Create a Cross-Selling Strategy with WooCommerce (In 3 Steps)
MailOptin allows you to set triggers for different actions. A trigger is a kind of conditional logic that activates a certain feature when a customer performs an action on your site. For example, when a user makes a purchase or reaches a certain amount in their cart, they receive an offer.
You can display opt-ins to encourage add-on sales when a customer adds a certain product to their cart. That way, you can offer them a related product – and even a discount, if they act fast.
Let’s look at how to create a cross-sell strategy in WooCommerce, using MailOptin’s WooCommerce Added to Cart trigger.
1. Decide What Display Method You Will Use
Before you get started, you’ll need to decide how your opt-in will look. MailOptin gives you the ability to create opt-ins in different formats, including lightboxes, slide-ins, and notification bars.
A lightbox pop-up appears on top of the page content. It’s impossible to ignore, since the user can’t do anything on the page until they either accept or reject the offer:

Another option is slide-in campaigns. These normally appear in less prominent areas, such as page corners. The user can finish what they were doing before turning their attention to the opt-in. However, slide-ins may still cover part of the content:
On the other hand, notification bars may appear at the top or bottom of the page. They are perhaps the least intrusive of the options we’ve discussed, but they’re also easier to miss:

As you can see, there are several options to choose from. However, it’s important to factor your audience’s needs and preferences into your choice.
2. Set Up Your Cross-Sells
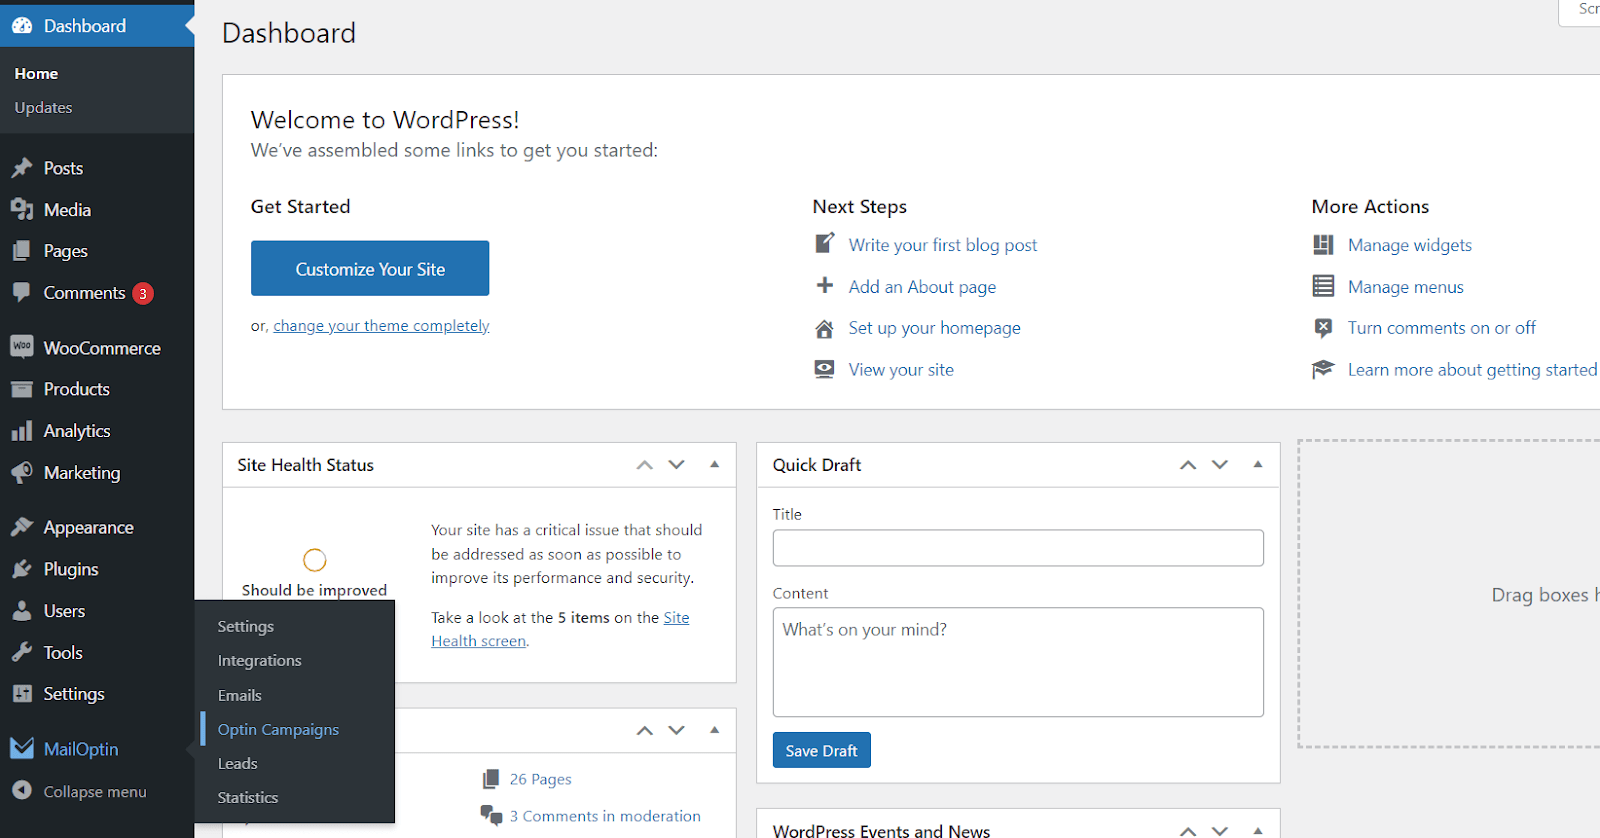
Once you’ve installed and activated MailOptin on your site, navigate to MailOptin > Optin Campaigns in your WordPress dashboard:
Then, click on the Add New button:

Next, you can enter a descriptive title for your campaign and select an opt-in type:

You’ll then be directed to the form builder. Here you can customize the design of your cross-sell:

You can edit individual elements, such as text and images, by clicking on them and using the settings in the panel on the left. Remember to save your changes when you’re ready.
3. Configure the Trigger for Your Cross-Sell Campaign
Once you’ve designed your opt-in campaign, you’ll need to set a trigger for it. To do this, click on Display Rules > WooCommerce Added to Cart:

You can now activate the display rule. If you only want particular products to trigger the opt-in, you can specify them in the Required products field:

When you’re ready to use the opt-in, activate it with the toggle switch at the top left:

That’s it! Your cross-sell campaign is now up and running on your WooCommerce store.
Conclusion
Cross-selling can be an effective way to boost your profits. This strategy involves recommending additional products to your customers when they’re about to make a purchase. Normally, these items complement the product that the customer is interested in.
Creating a good cross-sell strategy takes analysis and patience, but implementing it can be simple thanks to WooCommerce and the MailOptin plugin. Using these tools, you can offer personalized recommendations when users add a product to their shopping carts.
Do you have any questions about how to create a cross-sell strategy on WooCommerce? Let us know in the comments section below!