Here is a collection of tips, snippets, customizations and how-to tutorials to answer your biggest WooCommerce questions, curated by Rodolfo Melogli.
Please remember feedback is vital and that your social media shares, blog comments and WooWeekly newsletter sign ups help me understand which WooCommerce content works and which not, so that I can fine-tune my writing :)
Thank you in advance and enjoy!
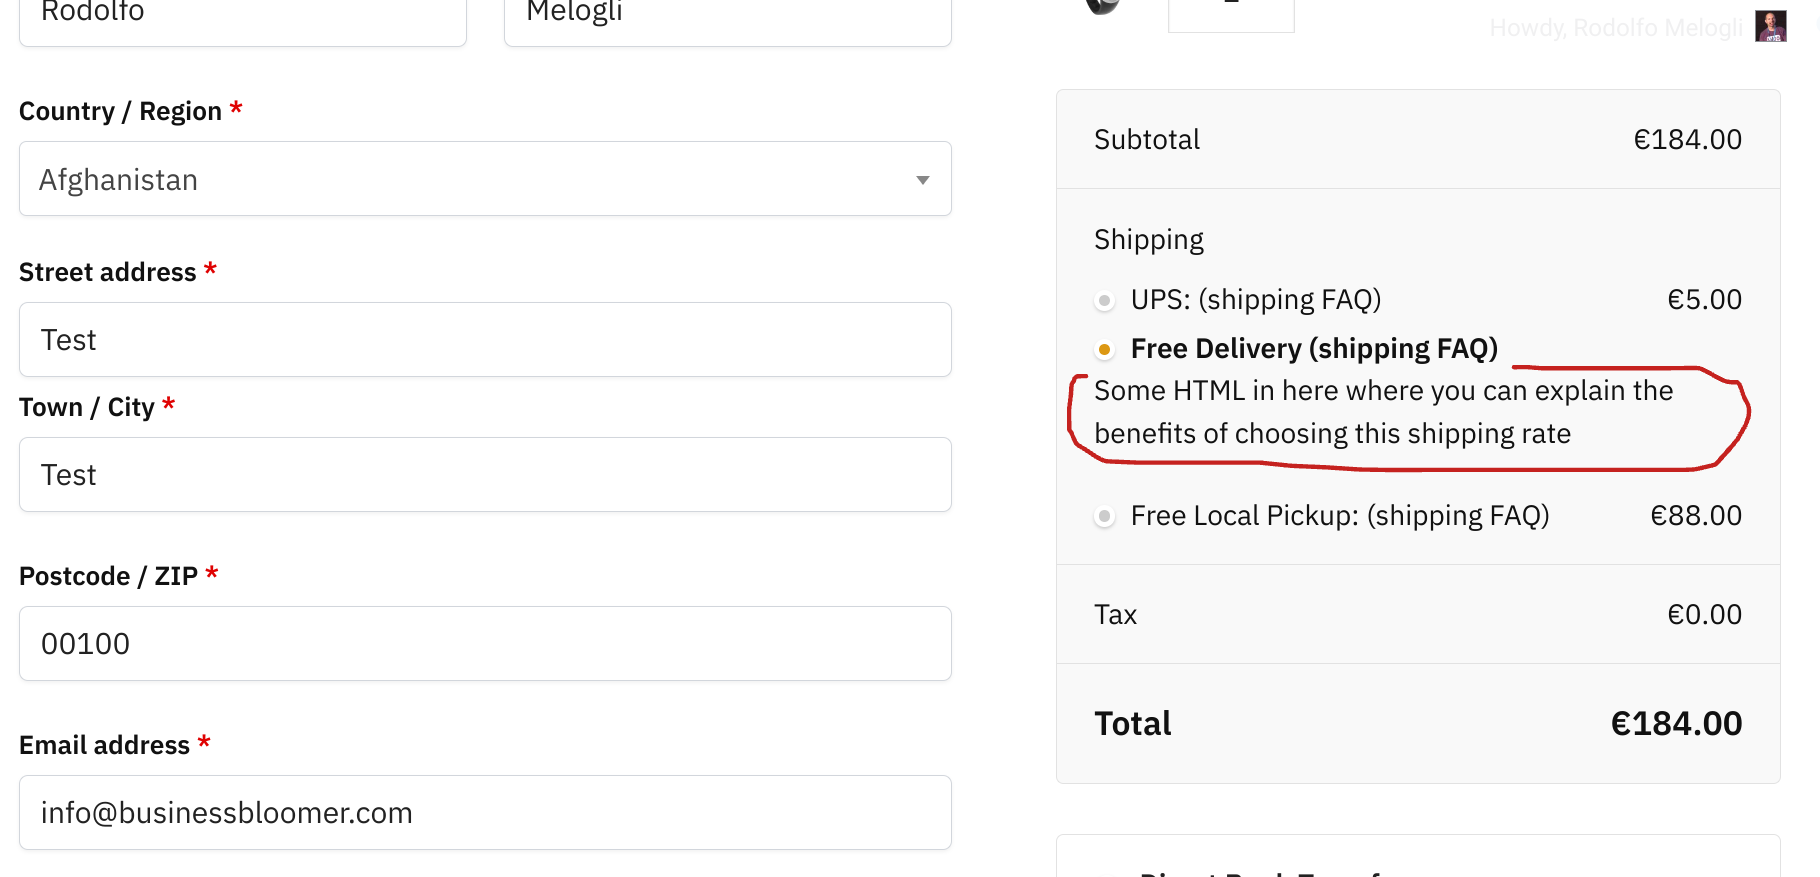
Each payment method on the WooCommerce Checkout page comes with a description right below the label. What if we could achieve something similar for the shipping rates, so that we can explain to the customer the difference between each method?
This question came up today in our private Slack channel for Woo developers, and we were able to write a quick snippet that does the trick. Here’s the complete code – enjoy!
Continue reading WooCommerce: Add Shipping Rate Description @ Cart & Checkout Page
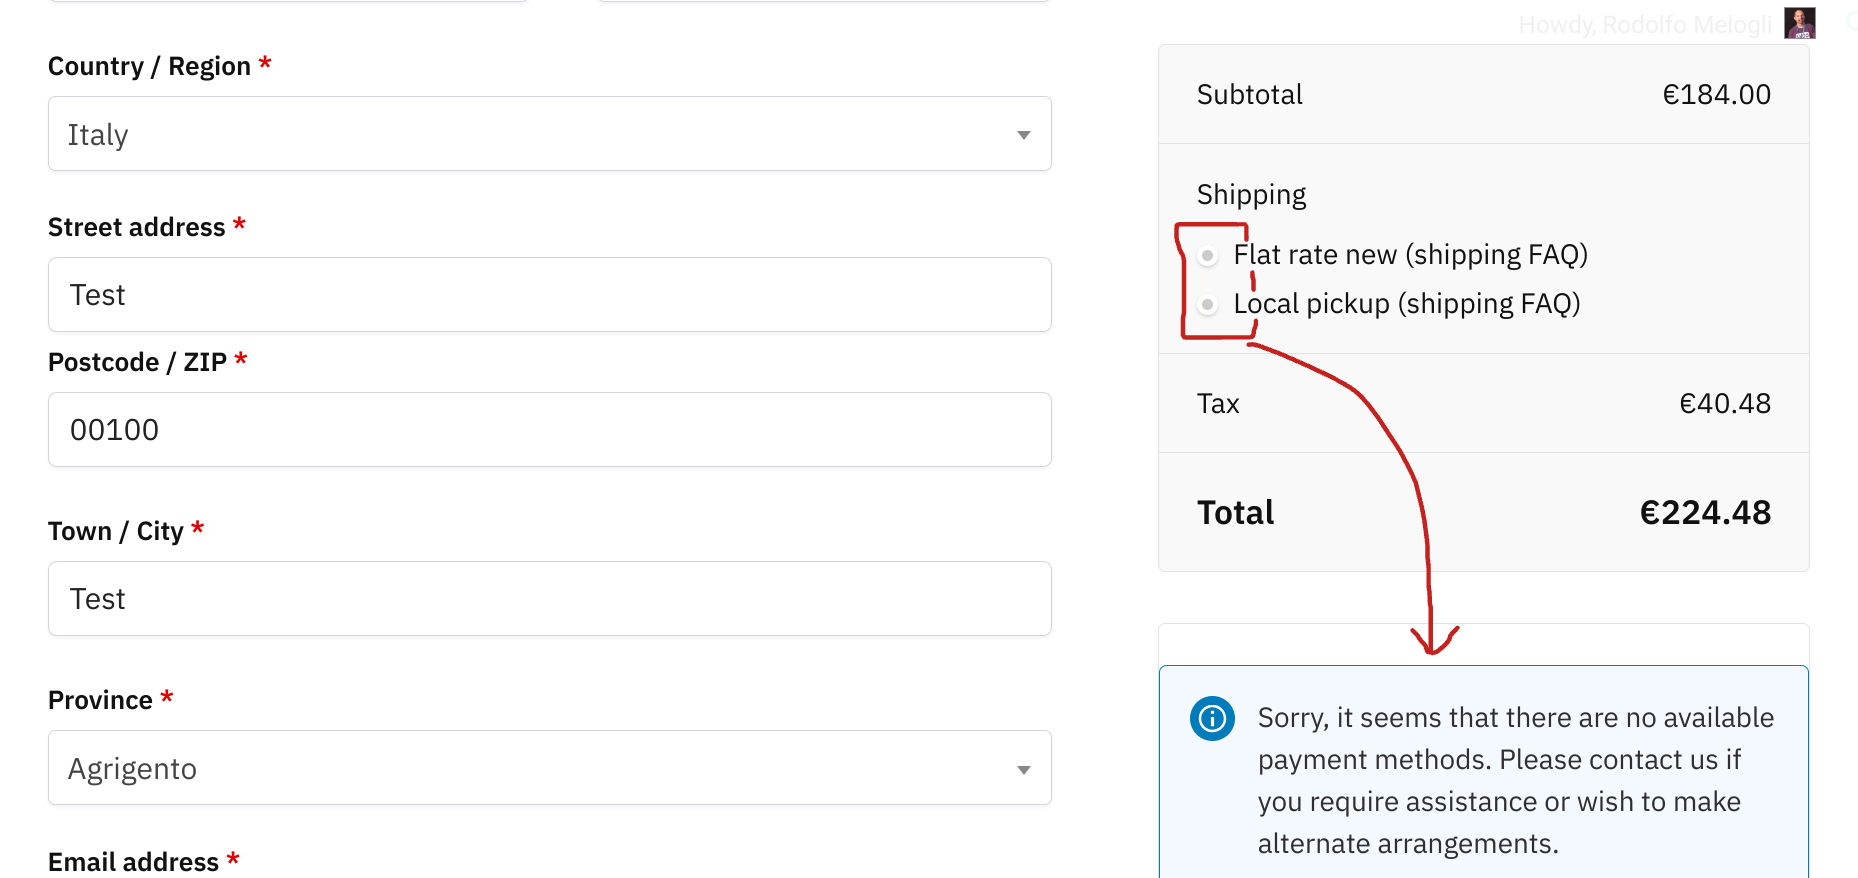
We already saw how to disable the default payment gateway in the WooCommerce Checkout page, so that users are forced to click on one of the options.
Well, we can do the exact same with the shipping methods!
In this way, customers will be forced to actually click on one of the shipping options. This is helpful when you don’t want to have a default shipping, and when your customers often “forget” to pick the correct one and ask to change it once the order has been placed.
Enjoy!
Continue reading WooCommerce: No Default Shipping @ Checkout Page
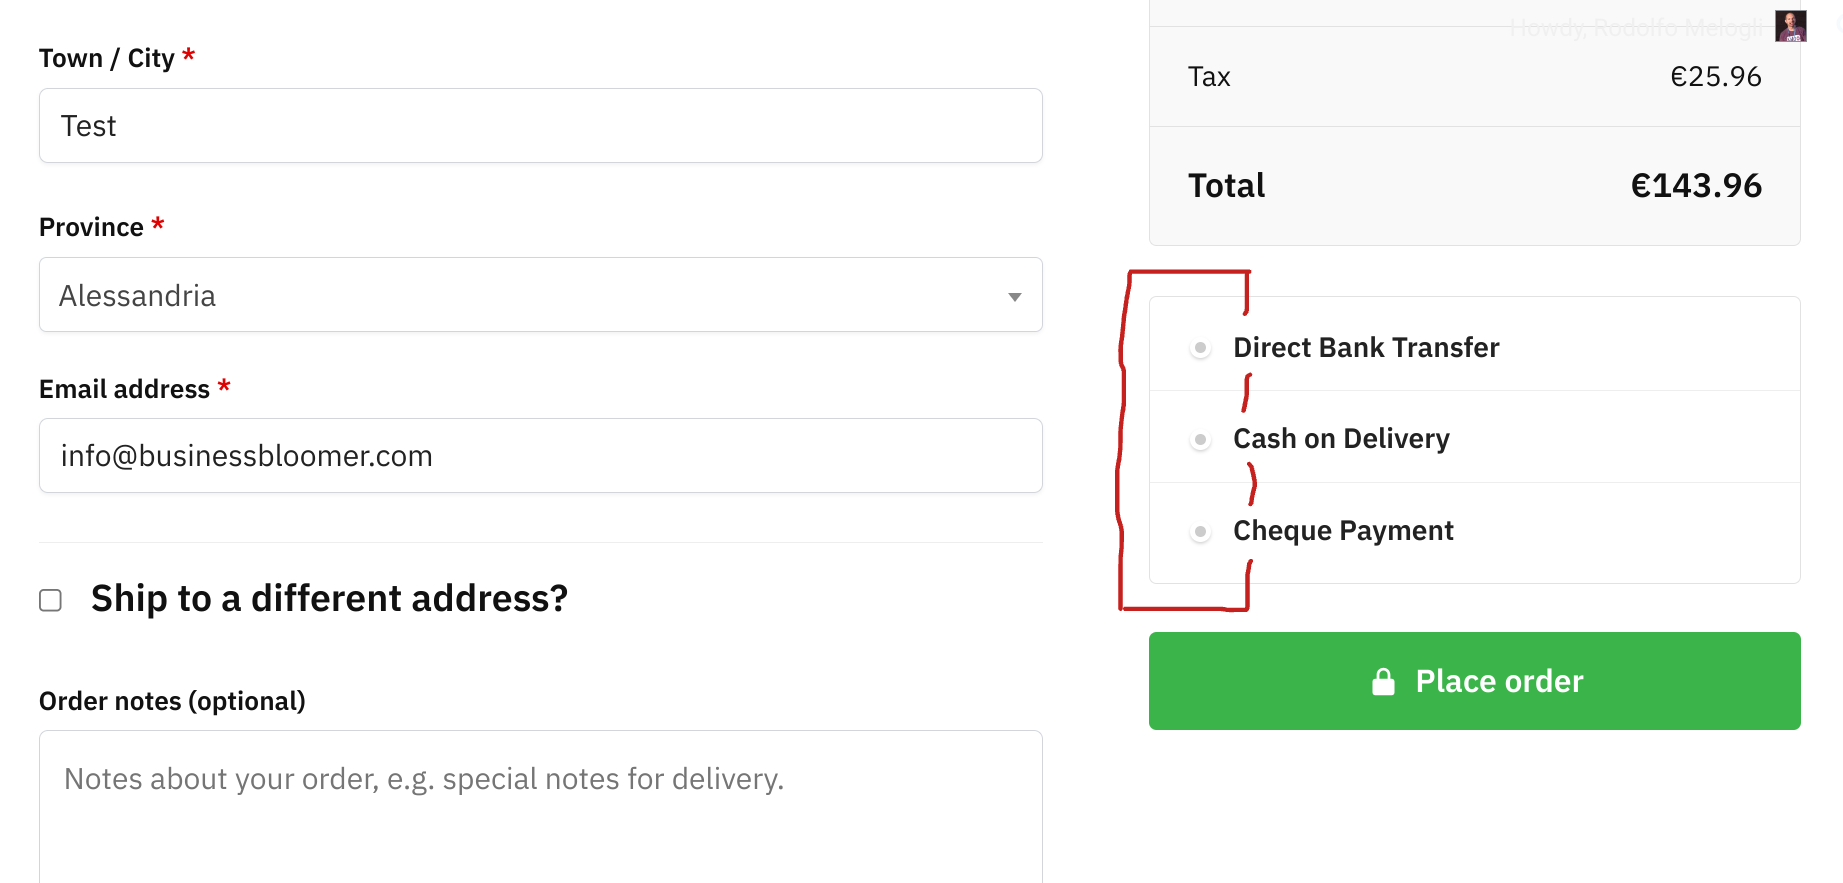
When you land on the WooCommerce Checkout page, one payment option (radio button) will be selected by default. this is defined based on the last payment method (logged in customer), or the payment gateway sorting (logged out customer).
Often it happens, however, that customers forget to change their payment selection, and therefore end up checking out with the wrong payment option. Which means, more admin work.
With this simple snippet, we will inject some JS in the Woo Checkout page, so that on load, all payment method radio inputs will be unchecked. Super easy!
Continue reading WooCommerce: No Default Payment @ Checkout Page
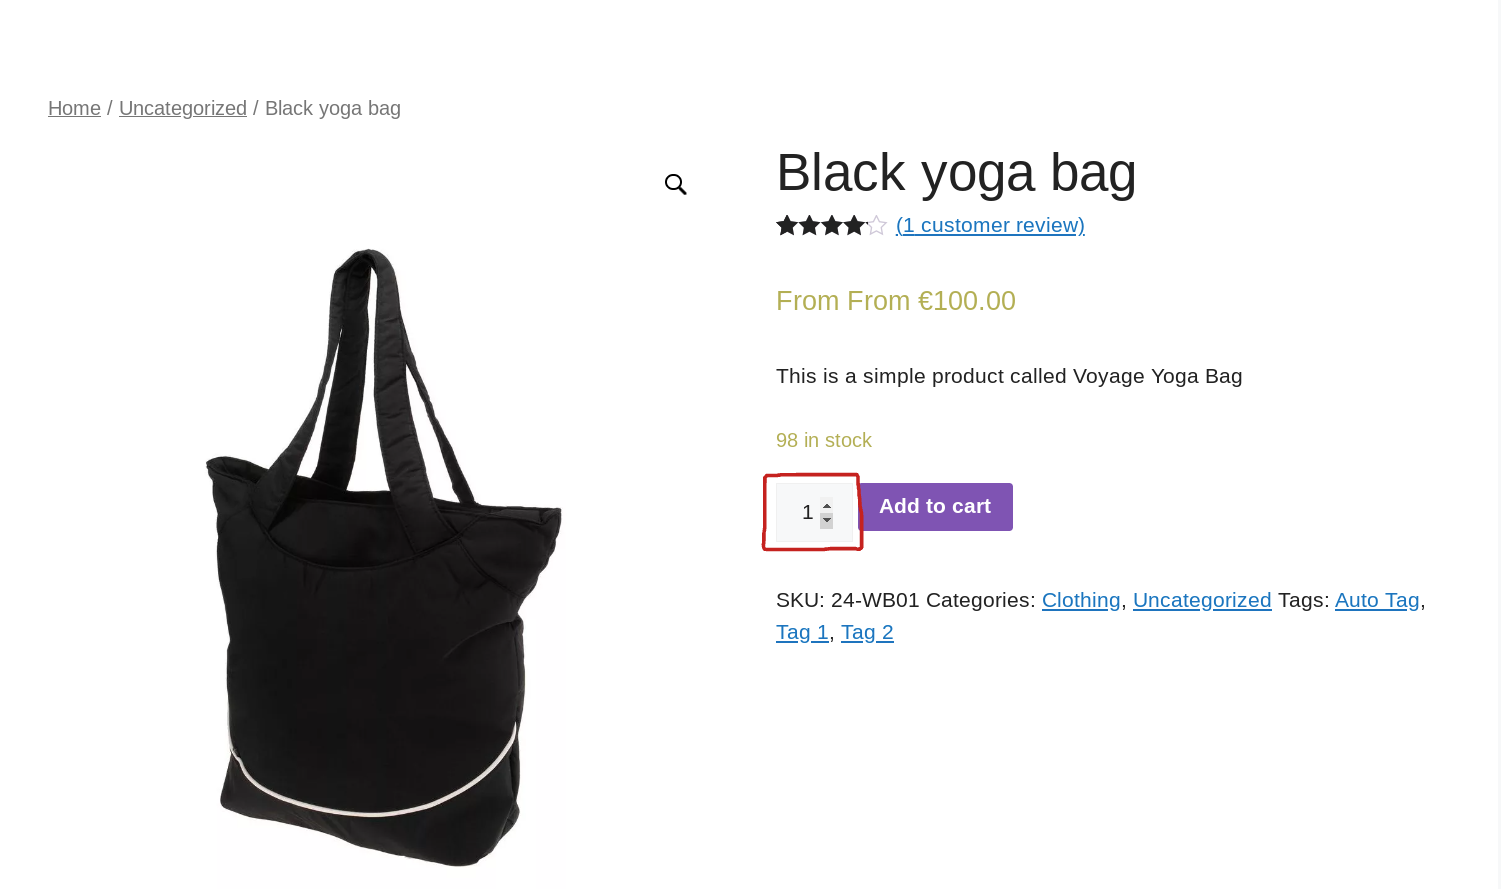
Most browsers show “up and down” arrows inside number inputs. The WooCommerce add to cart quantity is a number input also, which means this will get the arrows as well.
But especially when you have add to cart plus minus buttons, the up and down arrows become useless. So, here’s a way to hide them via custom CSS.
Enjoy!
Continue reading WooCommerce: Hide Add To Cart Quantity Input Arrows

Especially for B2B sites, it’s likely that customers are managed by the store admin and are not allowed to change their billing/shipping address unless they request to update it.
But even if you’re simply curious, there is a way to turn each checkout field into read-only inputs. In this way, the saved billing and shipping address will load, and the logged in customer won’t be able to change any data before checkout.
A little note: country and state are dropdowns, and this means adding the “readonly” attribute won’t stop you from changing the selected value. However, if we turn all fields to input type “text”, this problem will go away. And this is why you find two statements in the snippet below; first we turn the field into a text input, and then we make it read-only.
Enjoy!
Continue reading WooCommerce: Read-only Checkout Fields

Reaching customers globally can increase your WooCommerce website sales.
Besides, because your WooCommerce website can now operate in several countries, this reduces dependence on a single market and the risks associated with economic downturns and changes in consumer behavior.
To reach customers globally throughout the world, it is necessary to have a WooCommerce website that is available in their native language, as a huge percentage of online customers prefer to purchase products that are accompanied by information presented in their language.
This means you have to create a multilingual WooCommerce website, and AI translation may help you get there faster.
Continue reading WooCommerce: How to Implement AI Translation

WooCommerce product images on the Single Product page get the default Zoom + Lightbox + Photoswipe behavior. This is super helpful when the images are super important for sales conversion, and less helpful in other cases (in fact, here’s a snippet to disable Zoom etc. from the Woo product pages).
Now, the challenge that I had on this same website was that I wanted blog readers to also enjoy the same WooCommerce zoom / lightbox features on blog post images and screenshots. So, without reinventing the wheel, I’m now loading the WooCommerce scripts on pages like this one (single post), and on image click I trigger the lightbox!
You can test the feature by clicking on the image below. Enjoy!
Continue reading WooCommerce: How to Reuse Zoom/Lightbox Scripts On Non-Product Images

If a WooCommerce checkout field is set to “not required“, its label will get the “(optional)” suffix. Considering the required fields get the red “*” suffix, you may want to get completely rid of the (optional) string.
Sure, you could be using CSS to hide it… but as usual this is not ideal. With CSS display:none, the string loads and then you hide it; with PHP you avoid the loading in the first place.
So, let’s see how this is done – this snippet is also running on this same website so it should definitely work!
Continue reading WooCommerce: Remove “(optional)” From Checkout Field Labels
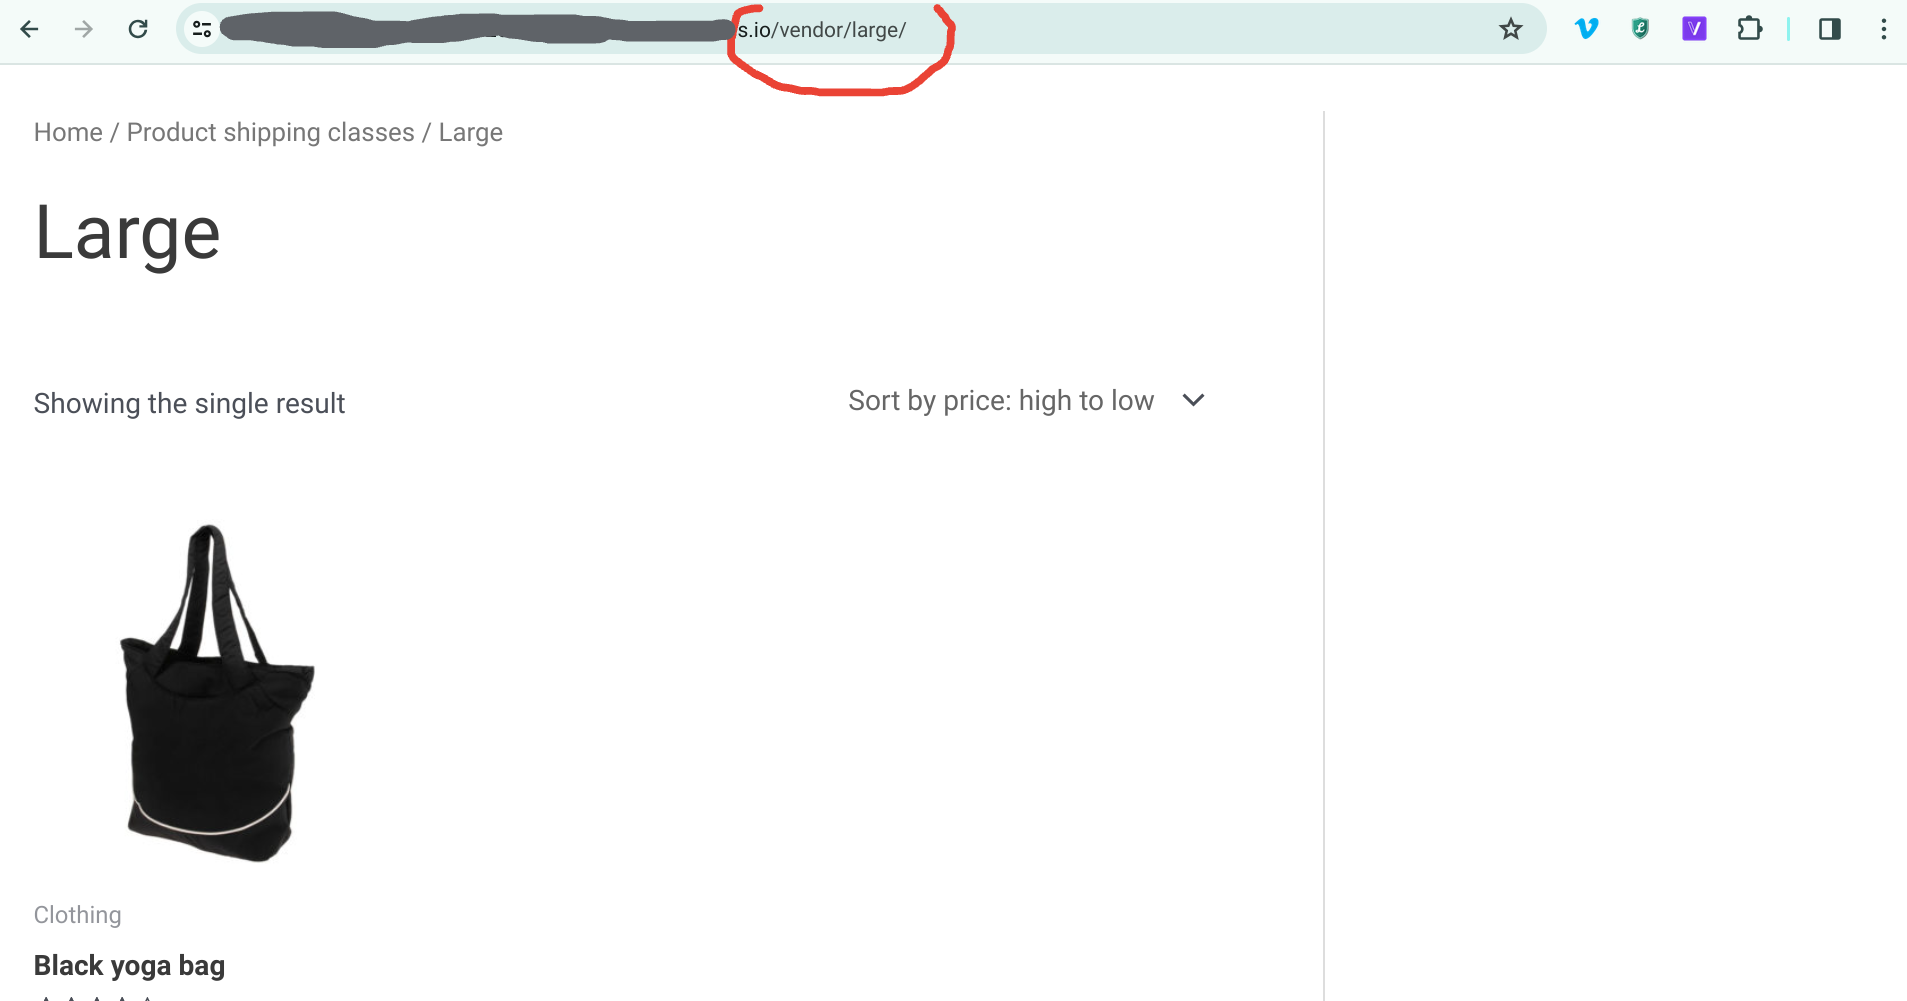
In WooCommerce you have publicly accessible product archives for product categories e.g. “all tables“, product tags e.g. “all casual” and product attributes e.g. “all medium“. URLs are available to you and you can even define their custom permalink slug base via the settings e.g. /product-tag/, /product-cat/, etc.
What’s interesting though, is that there are many more “custom taxonomies” that are registered in WooCommerce, however they don’t seem to have their own archive, because it’s been decided they were not useful.
But what if you want to see, as a customer, all the shop products belonging to a specific shipping class? We’ve seen, for example, how to split the cart into packages based on shipping class – so it would be super helpful to customers, in such a case, to view all the products belonging to each shipping class at a given URL.
So, let’s do that!
Continue reading WooCommerce: Product Archive For Shipping Classes
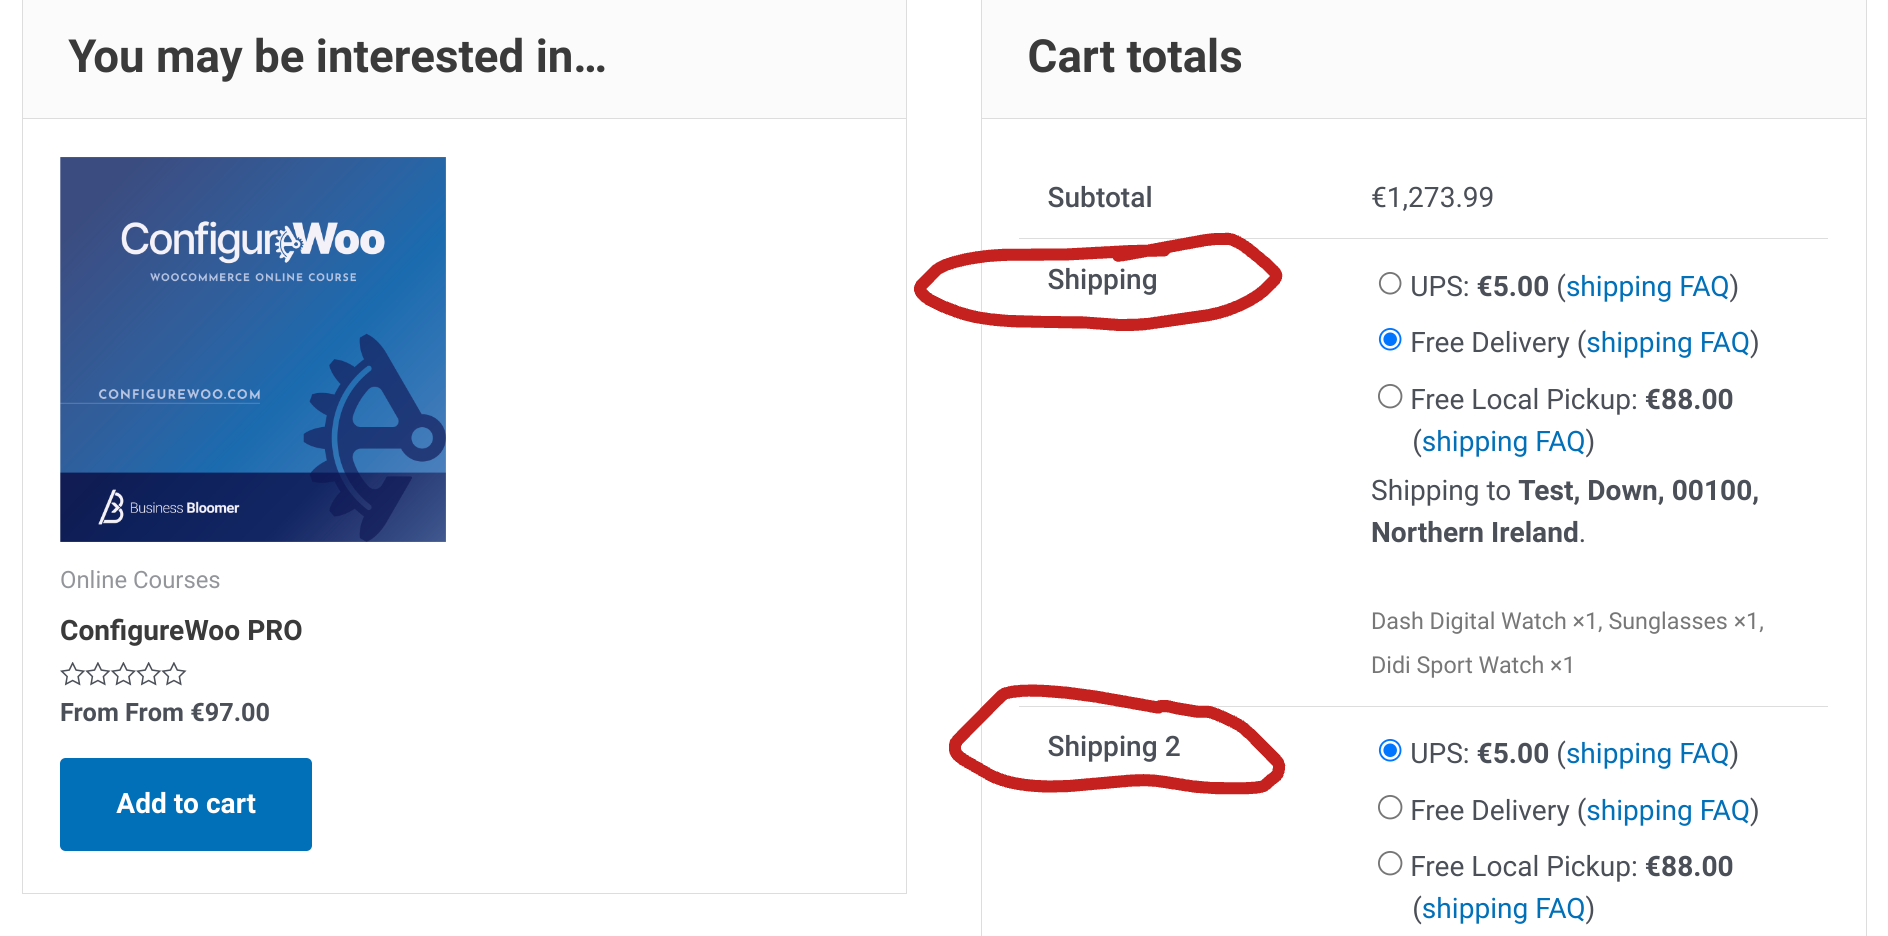
There are a million plugins out there that allow you to make the most of WooCommerce “cart packages” – this is a short way to say that you have the chance to assign cart items to multiple “packages“, so that the customer can pick different shipping methods for each package.
For example, imagine you sell products that are only available for “pick up in store“, and others that are shippable. By splitting the cart into 2 packages, the customer can place both product types in the same cart, but will be able to choose “Local pickup” for package 1 only, while for package 2 they’ll select one of the available delivery rates.
Splitting the cart into multiple packages is as easy as looping through the cart items, and assigning them to its own package array based on shipping class. Enjoy!
Continue reading WooCommerce: Split Cart Into Packages

Business Bloomer website sells in USD only for the time being, as that seems to be the standard for WordPress plugin / products stores.
However, I prefer to invoice clients in EUR (I also switch PayPal and Stripe keys on the go). Which means, I needed to find a way to “set” a different currency whenever I create a manual order (which, by default, is in USD). So, here’s the fix!
Continue reading WooCommerce: Set Different Currency For Manual Orders

I have a tag called ‘Sold out’; the slug is ‘sold-out’. Where do I find the ID?

n a recent Business Bloomer Club Slack thread, a WooCommerce user recently brought up a common but tricky customization challenge: hiding product gallery thumbnails while ensuring only selected variation images appear.
This type of customization can improve UX, focusing customer attention on their selected product variation without visual clutter from thumbnails. Our community brainstormed some effective solutions to streamline this visual experience without compromising functionality.
Here’s a breakdown of the steps discussed to achieve a seamless view that only displays variation-specific images.
Continue reading How to hide the WooCommerce product gallery for variable products?

We are looking for a bundle module or script that would allow us to assign an SKU to the bundle. Now we are using https://yithemes.com/themes/plugins/yith-woocommerce-product-bundles/ and it works well but it doesn’t allow us to have an SKU for the bundle. We need this because we send the orders in our ERP.
Any idea of a plugin wiht this feature? Or can we add a script to add the SKU to the bundle?

Is there a way to create a type of WooCommerce user who can only see the Sales Reports (or only the Woo Analytics Area)?
We have a partnership with a direct sales network for one of our websites and they would like to be able to see the sales figures in real time without calling us.
Let's Talk WooCommerce, In Person
I'm bringing together WooCommerce professionals who care about code, business, and real connections. Smart conversations, useful takeaways, and a chance to meet in person in Palermo, Italy.
Join Us at Checkout Summit 2027 →
