
Crocs started by selling just foam clogs, and now they’re a billion-dollar company. Casper earned millions selling only mattresses, while Sara Blakely became one of the youngest self-made female billionaires with Spanx, which sold only underclothes initially.
Can you guess what all these brands have in common? It’s that they started off by selling just one product, built their entire brand around it, and yet became successful.
Today, most eCommerce businesses sell multiple products – because of the presumption that the more products you offer, the higher chances of converting visitors and making a sale. But from managing operations to inventory, a store with many products comes with its own problems.
On the other hand, selling just one product can streamline your store’s operations and make inventory management and handling orders easy.
It allows you to focus all your energy and resources on creating, marketing and improving a single product. If done correctly, this can help you build a significant brand value – as people will start associating your store with your flagship product, making you an expert in your market and helping you stand out from your competitors.
Given its benefits, creating a one-product store is an excellent idea – all you practically need is the right product for your customer’s needs and a solid, easy-to-navigate website.
Lucky for you, this article will help you with the latter, taking you through all the steps of creating a fantastic WooCommerce website for your one-product store.
Let’s begin!
Things to keep in mind before building a one-product WooCommerce store
Since you’re selling only one product, the key to making your online store successful is choosing a product with high demand and that you can sell in large quantities.
For instance, you can consider selling a digital product (since they don’t involve any manufacturing or shipping costs) or a niche product that targets a particular customer base.
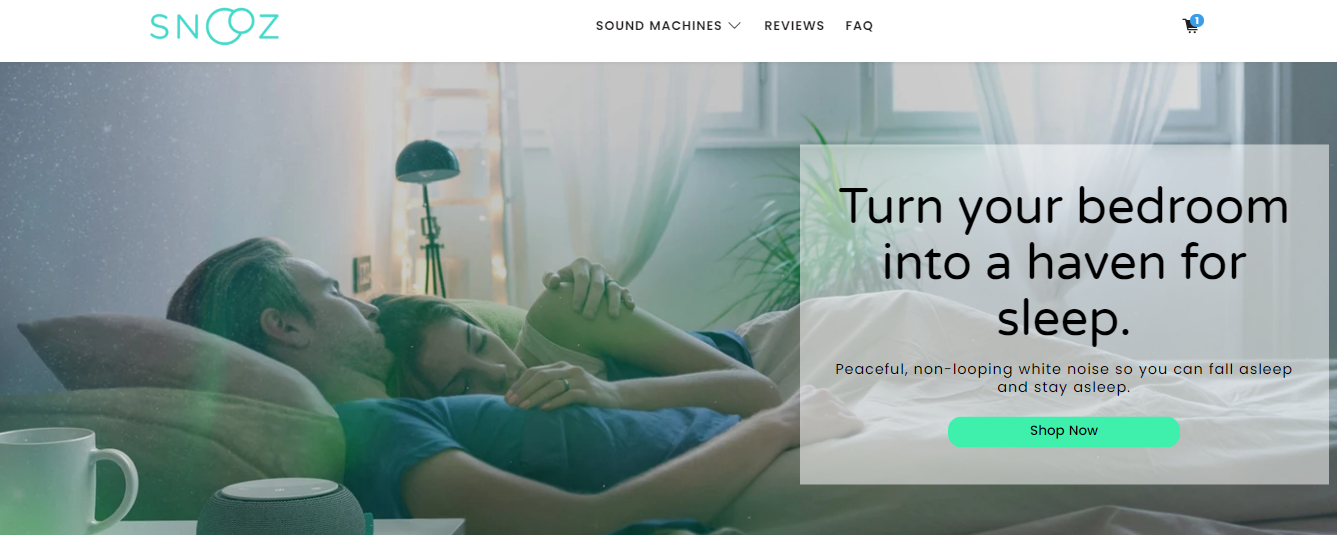
Next, for a one-product store, high-quality product photography, excellent copy, and a clear and compelling Call-to-Action (CTA) become all the more important. Here’s Snooz homepage, putting the spotlight on its only product:
To incorporate the above elements and create a smooth and reliable WooCommerce website, you need to invest in a domain name and WordPress-friendly hosting. There are some excellent WooCommerce hosting options for this – see what suits your requirements and budget.
A one-product store also requires an appropriate WooCommerce theme – one that’s simple and puts focus on your signature product. ThemeForest has some great One Product options for this, as well as TemplateMonster.

Now that you’ve got the basics covered, let’s dive into how you can get your one-product WooCommerce website up and running!
Creating your only WooCommerce product
Already know how to create a WooCommerce product? No problem – skip to next section
Once you’ve installed and configured WooCommerce on your WordPress website, the process to upload and publish a product is pretty straightforward.
Go to Products > Add New. Here, you can set the product title and description and upload photos.

Since you’re selling only one product, add several images showing it from different angles, in use, and its variations (if any).
As you scroll down, you’ll also see a Product Data block. Here, you can select whether the product is simple, grouped, external/affiliate, or variable from the dropdown.


Besides the product’s price, inventory, and shipping details, you can also set its attributes and variations from here.
Let’s say you’re selling a variable product – a shirt with three sizes (Small, Medium, and Large) and two color (Blue and Green) variants. “Size” and “Color” become your product attributes, and there are two ways you can add them.
You can create global attributes from Products > Attributes.

Or, you can create manual attributes right from the Product Data section by clicking on Attributes, Custom Product Attribute, and then Add.

Here, you can name the attribute (like Size) and set its values separated by a vertical pipe, | (like Small | Medium | Large).

Next, go to Variations and select Create variations from all attributes – this will create every possible combination of variations from your attributes and their values.

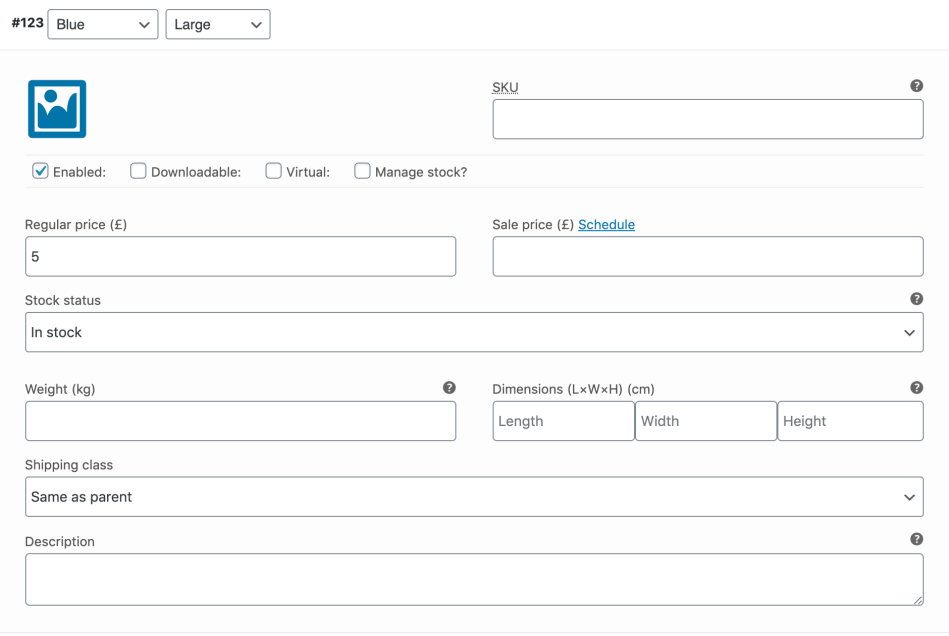
You can also add details like quantity, price, and images for each variant by clicking the pull-down.
Once you’ve set your product’s details, hit Publish, and your product will be live!
Creating a one-product store using WooCommerce’s default settings
While adding a product is simple, it’s the customizations you make to your store that’ll make it stand out and ease users’ experience.
An interesting thing you can do is make your product page your homepage, meaning that your domain.com will take customers straight to the product page where they can view the item and purchase it.
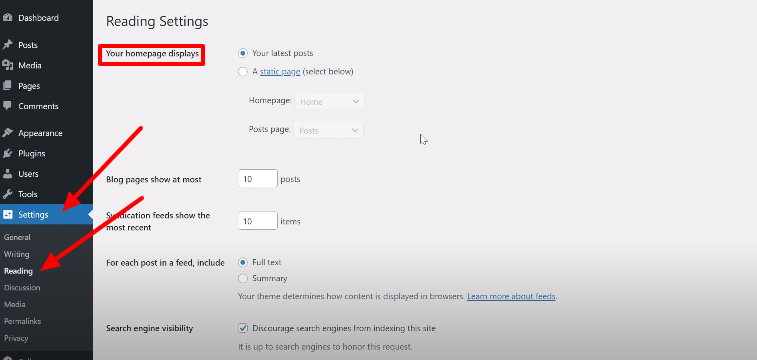
You can do this from Settings > Reading. In the “Homepage displays” settings, select “A static page.” Now, you can set your homepage to any page you want to, including the shop page or the single product page.

You can perform the same actions from your theme’s settings from Appearance > Customizer > Homepage Settings as well.
Next, since you’re offering only one product, you can allow your customers to skip the cart page and take them straight to checkout when they click on your product’s “Add to Cart” button.
You can do this by going to WooCommerce > Settings. Under the General settings in the Products tab, enable “Redirect to the cart page after successful addition” and save changes.

Then, click on the Advanced tab > Page Setup and set Checkout as the default cart page from the dropdown menu.

Voila! Now you’ll be able to take your customers straight from the homepage to the checkout page (that would make it a 2-page website to be honest, but you can also allow customers to check out right from your home/product page with the WooCommerce One Page Checkout plugin).
Using WooCommerce One Page Checkout plugin

WooCommerce One Page Checkout’s basic premise is to display product selection and checkout forms on the same page – so customers don’t have to visit a separate page for checkout.
But in a one-product store’s context, it helps by letting you turn your homepage / product page into a custom checkout page. Here’s how:
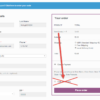
Once you activate the plugin, it shows a One Page Checkout option in the Product Data panel.

When enabled, this shows the checkout fields right on your product page, below the product information. This way, your customers can enter their billing details and purchase the product without going to another page.
You don’t have to separately set the above checkout fields as the plugin automatically displays them based on your theme’s default checkout template.
It doesn’t affect your original cart and checkout pages either – it still shows the latter to display receipt and order confirmation to customers.
Interestingly, it even lets you add the checkout form on any page or post of your store – like the home page, a landing page, or the hero banner – using shortcodes. All you have to do is add [woocommerce_one_page_checkout] shortcode to the page/post. You can even add content like Terms & Conditions or Refund Policy above or below this shortcode.
And, you can add the product_ids attribute to show your product above the checkout form.

What’s more, it also offers built-in templates so you can choose how your product is displayed here.
These templates include Product Table (which shows the product in a row with its thumbnail, title, and price), Product List (which displays the product title and price), and Pricing Table (which shows product details in a column).
But the Single Product template, in particular, can be great for your one-product store.
It displays your product as it’s shown on the product page, with the description, images, gallery, and other meta. This way, you don’t need to add custom content before the checkout shortcode and can cover necessary details within the product field.


No matter what settings or template you choose, the goal of this plugin remains to simplify the purchase process for your customers – by offering the checkout feature on not just one but many pages.
It also integrates with WooCommerce’s Bookings and Subscriptions extensions – so you can easily use this plugin if you plan to sell a bookable or subscription-based product.
WooCommerce One Page Checkout costs $79/year. It comes with 1-year extension updates and support and a 30-day money-back guarantee.
Conclusion
A vast catalog is not a prerequisite for a successful eCommerce business. In fact, setting up and running a one-product store can be much simpler when it comes to managing and updating inventory and marketing your business.
Luckily, WooCommerce offers some excellent features that help you set up your store quickly and make it easy to understand and navigate – which should be a one-product store’s top priority.
And if you wish to customize your shop and improve your customer’s experience further, a plugin like WooCommerce One Page Checkout is great to get started.


You can NOT set your homepage to a ‘single product’ in Settings > Reading > “Homepage displays”. You can set it to any static page and shop (store root) but NOT single product. If you know how to do this, please reply to me. Thx!
You’re right! But you can totally create a new WP page, put the [product_page id="xx"] shortcode in the content, and set the page as homepage!
Hi, thanks for your great content. I was wondering, is there a solution to have a the checkout on the same page of the product without a plugin? I have been trying several solutions, but none of them are working. The main issue is, as the checkout has no item, Woocommerce will not display it. And when I add items via AJAX, even though the item is added, and you can see it in the cart, the checkout form will not display it until I refresh, and that means it won’t show. Thanks in advance!
That’s why you need a plugin if you don’t want to refresh the page! There are other possible workarounds though -> on page visit, you programmatically add to cart and the checkout will be visible. Or some custom code to populate the checkout on the go without reloading the page.